SalesPlay POS offers a powerful Graphical Table Layout feature that allows restaurants and cafes to manage floor plans visually. This guide walks you through activation, customization, and adding tables to receipts.
Special Notes
- This feature is currently available on Android and Web POS, operates in landscape mode, and requires an internet connection.
- You cannot use standard and graphical layouts simultaneously. If you switch layouts with QR ordering activated, reselect tables and regenerate QR codes.
- For optimal experience, use screens 10 inches or larger.
- The term “Reservation / Table Room” in older versions is now called “Service Area”.
About Graphical Table Layout
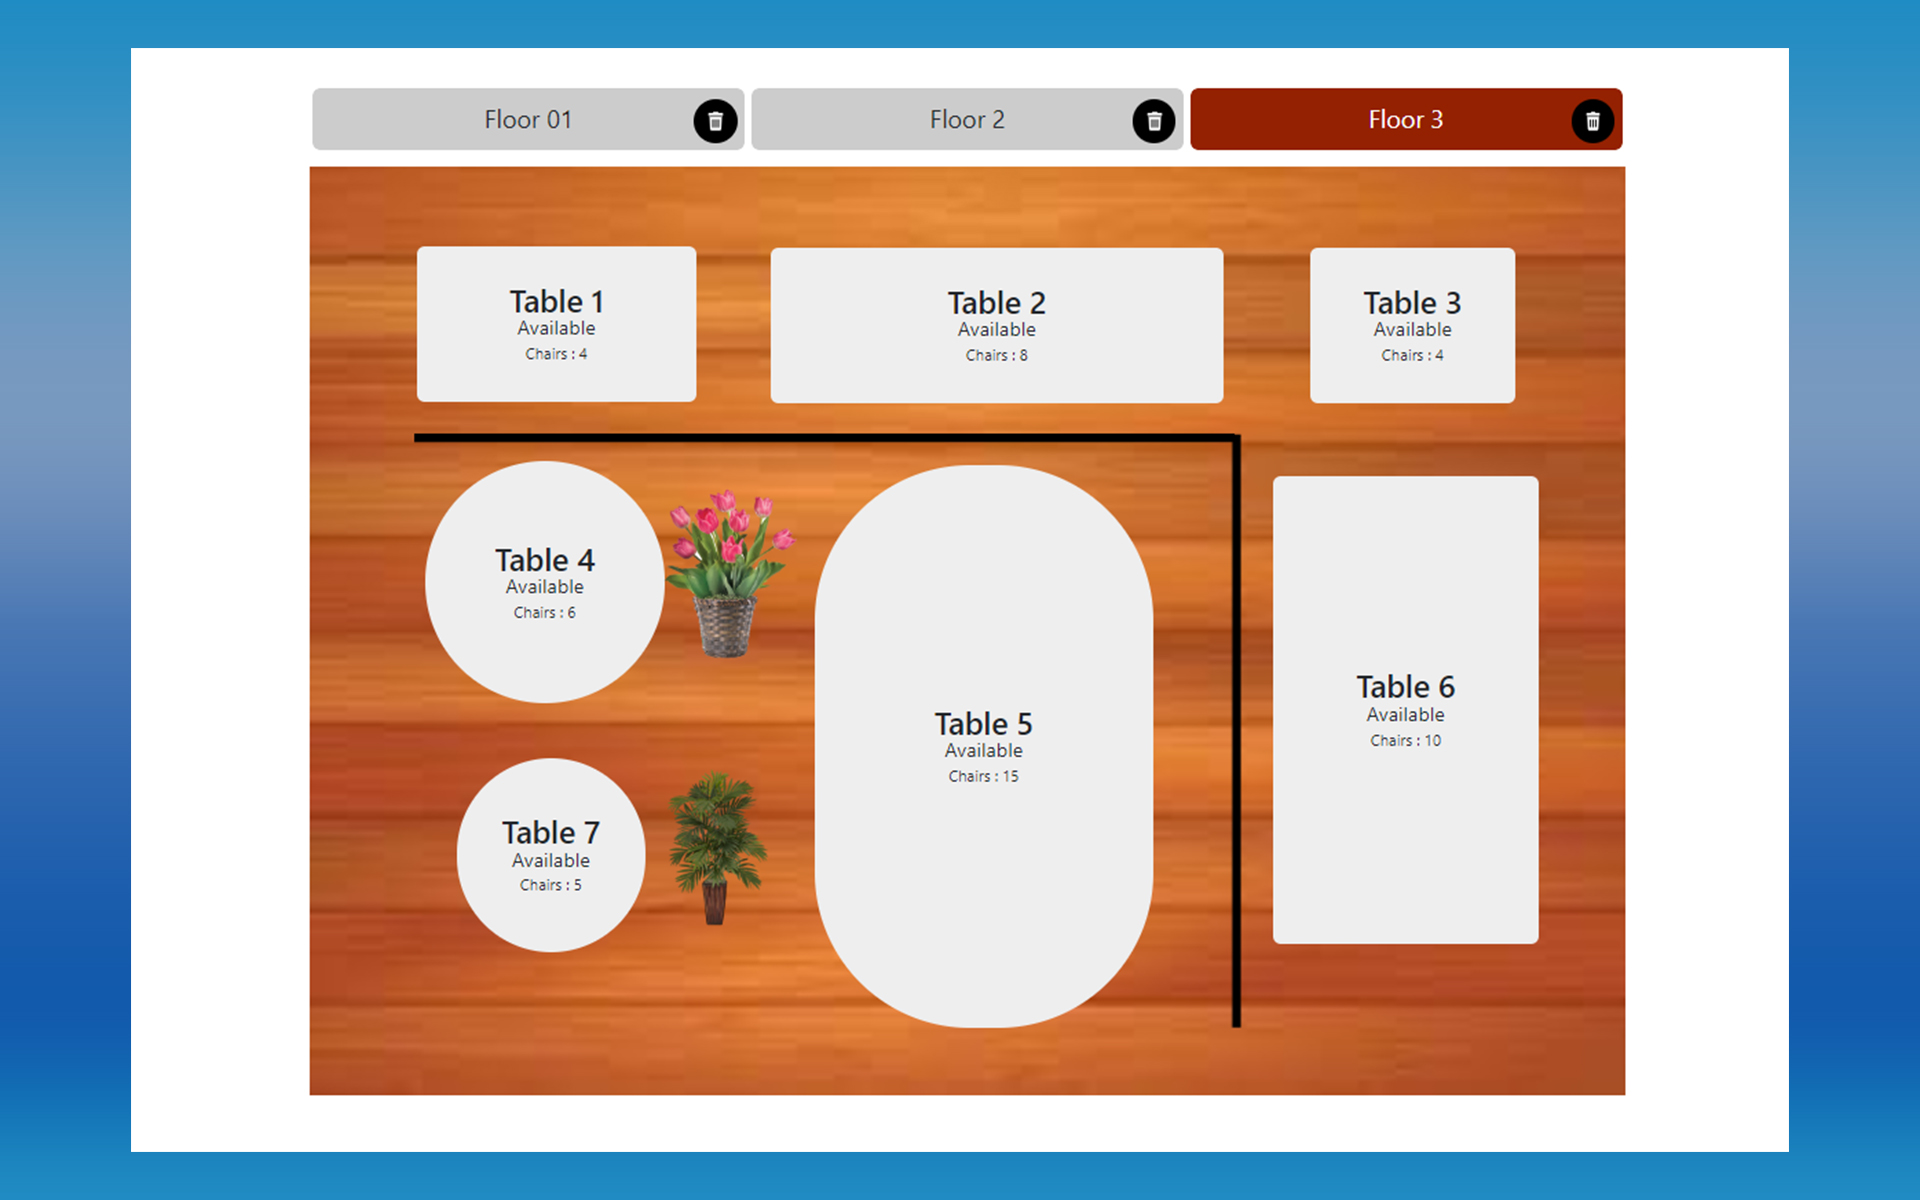
The Graphical Table Layout provides a visual interface to design and manage restaurant floor layouts with advanced customization. For multi-floor setups, managers can efficiently organize seating, decorations, and table arrangements.
Activation
To activate Graphical Table Layout:
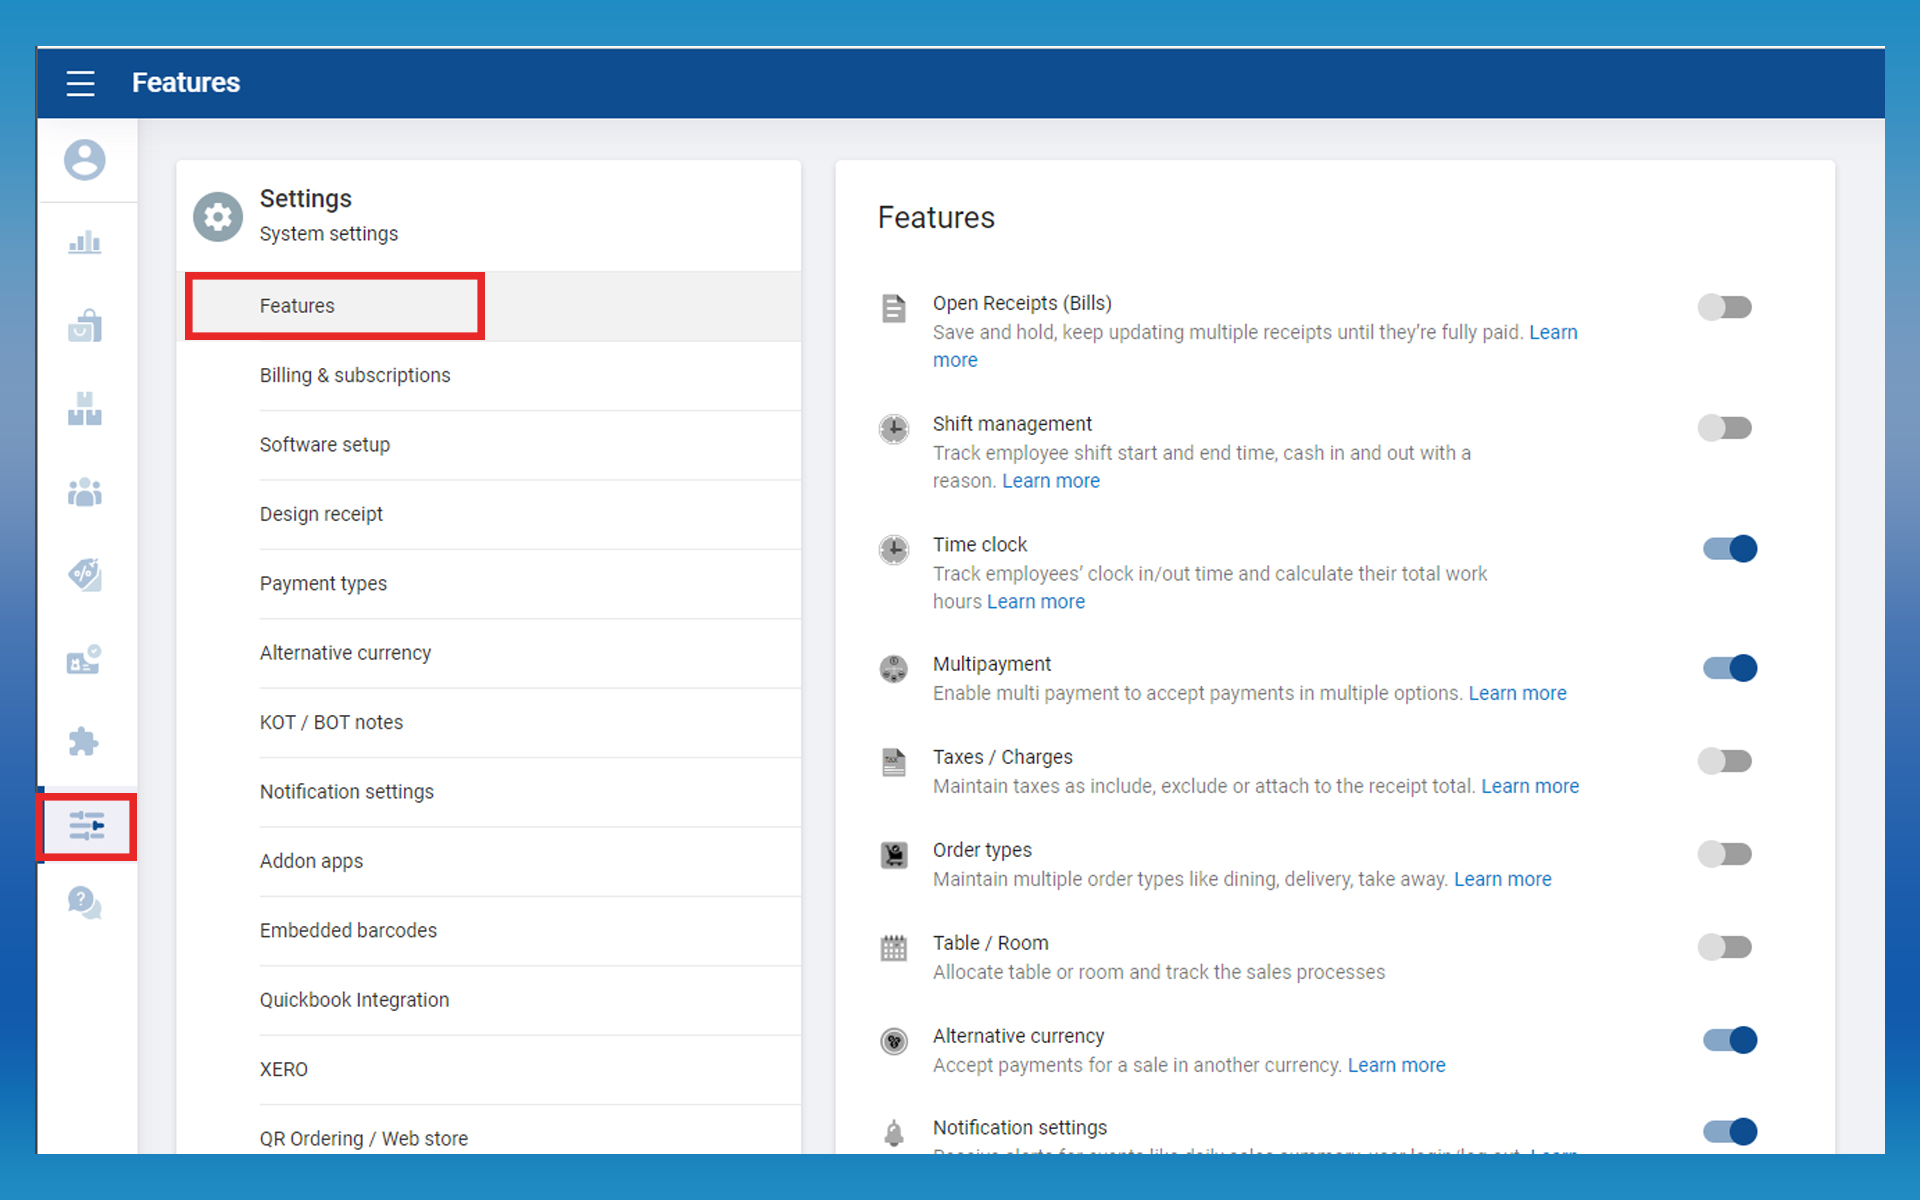
- Navigate to Back Office > Settings > Feature > Reservation.
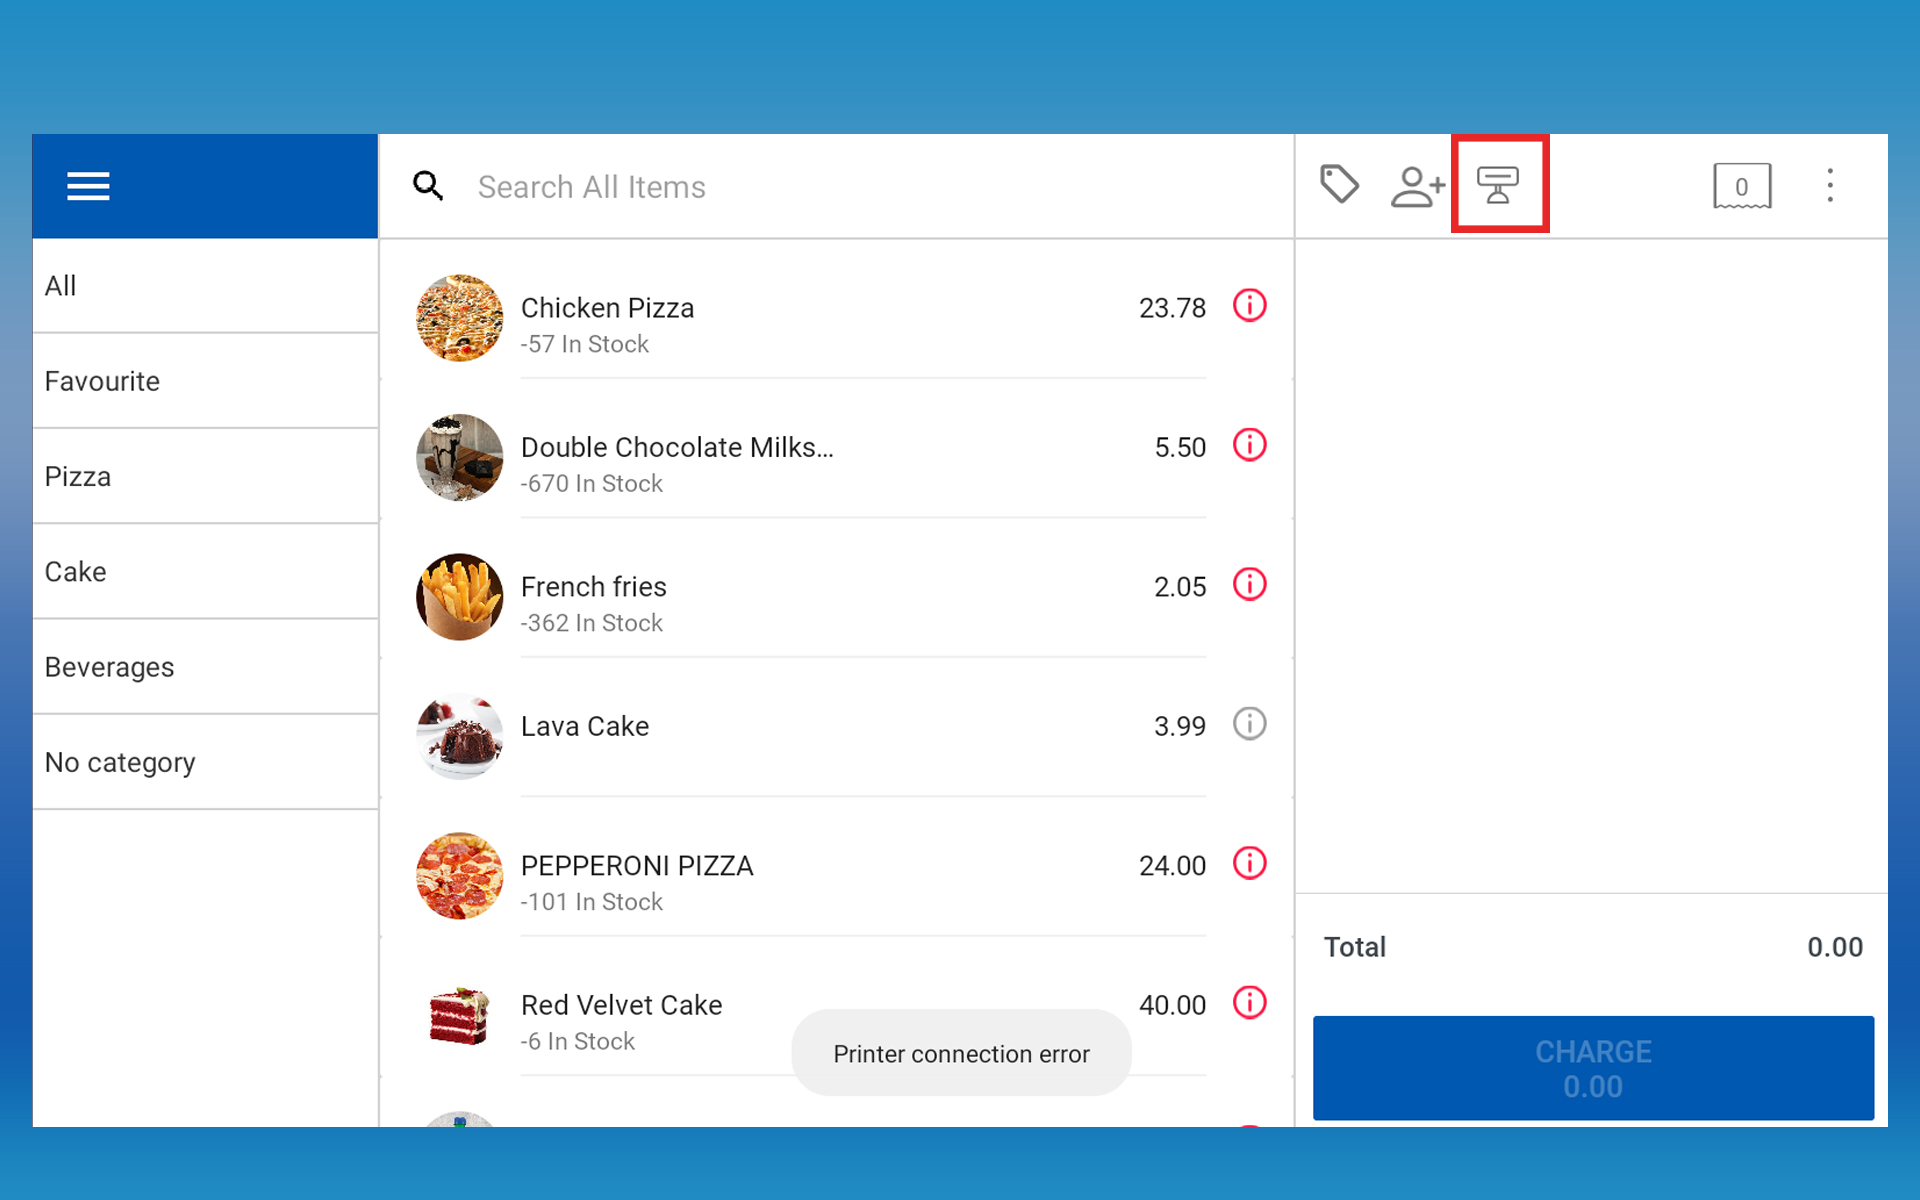
- Enable the feature, and it will appear in the POS app main billing interface as a Table Icon.
Interface Overview
Clicking the EDIT button unlocks the following tools:
- Floor: Create and manage multiple floors.
- Table: Add tables, choose shapes (square/round), set chair count, drag, resize, and rotate.
- Decoration: Add separators or decorative icons.
- Rotate: Adjust alignment for tables or decorations.
- Delete: Remove unwanted elements.
- SAVE: Save changes to the layout.
- Preview: Visualize the layout before finalizing.
Step-by-Step Layout Setup
- Create Floors according to your establishment’s levels.
- Add Tables: Choose shape, chair count, and arrange as needed.
- Add Decorations for visual clarity and aesthetics.
- Use Rotate and Delete to fine-tune the layout.
- Save and Preview changes to confirm the layout.
Table Status Color Indicators
- White: Available / unoccupied tables.
- Red: Occupied tables.
- Yellow: Selected or highlighted tables.
Step 1: Activate Service Areas
- Login to POS Back Office > Select Settings > Go to Feature.
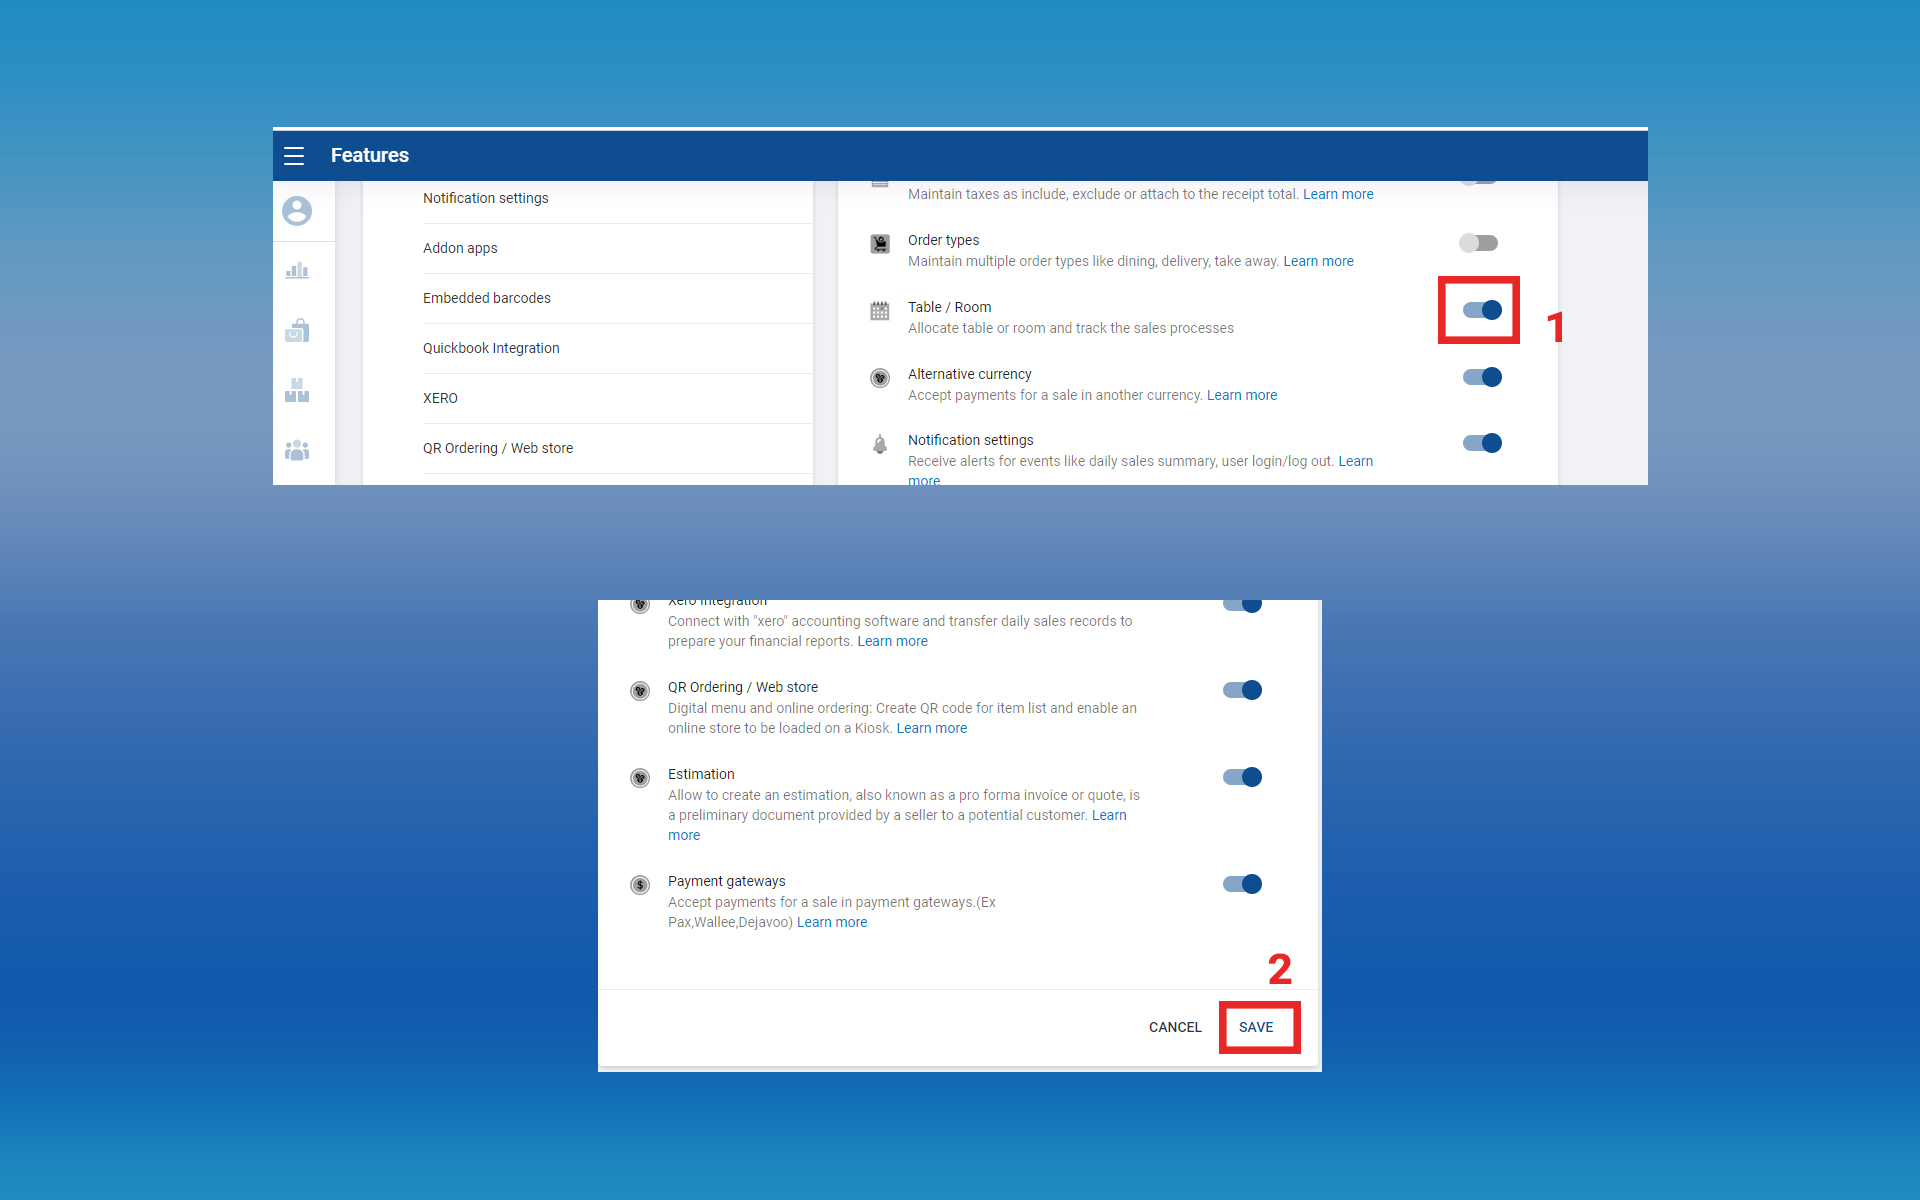
- Tick Service Areas > Click Save. It will appear as a sub-menu in Settings.
Step 2: Enable Graphical Layout
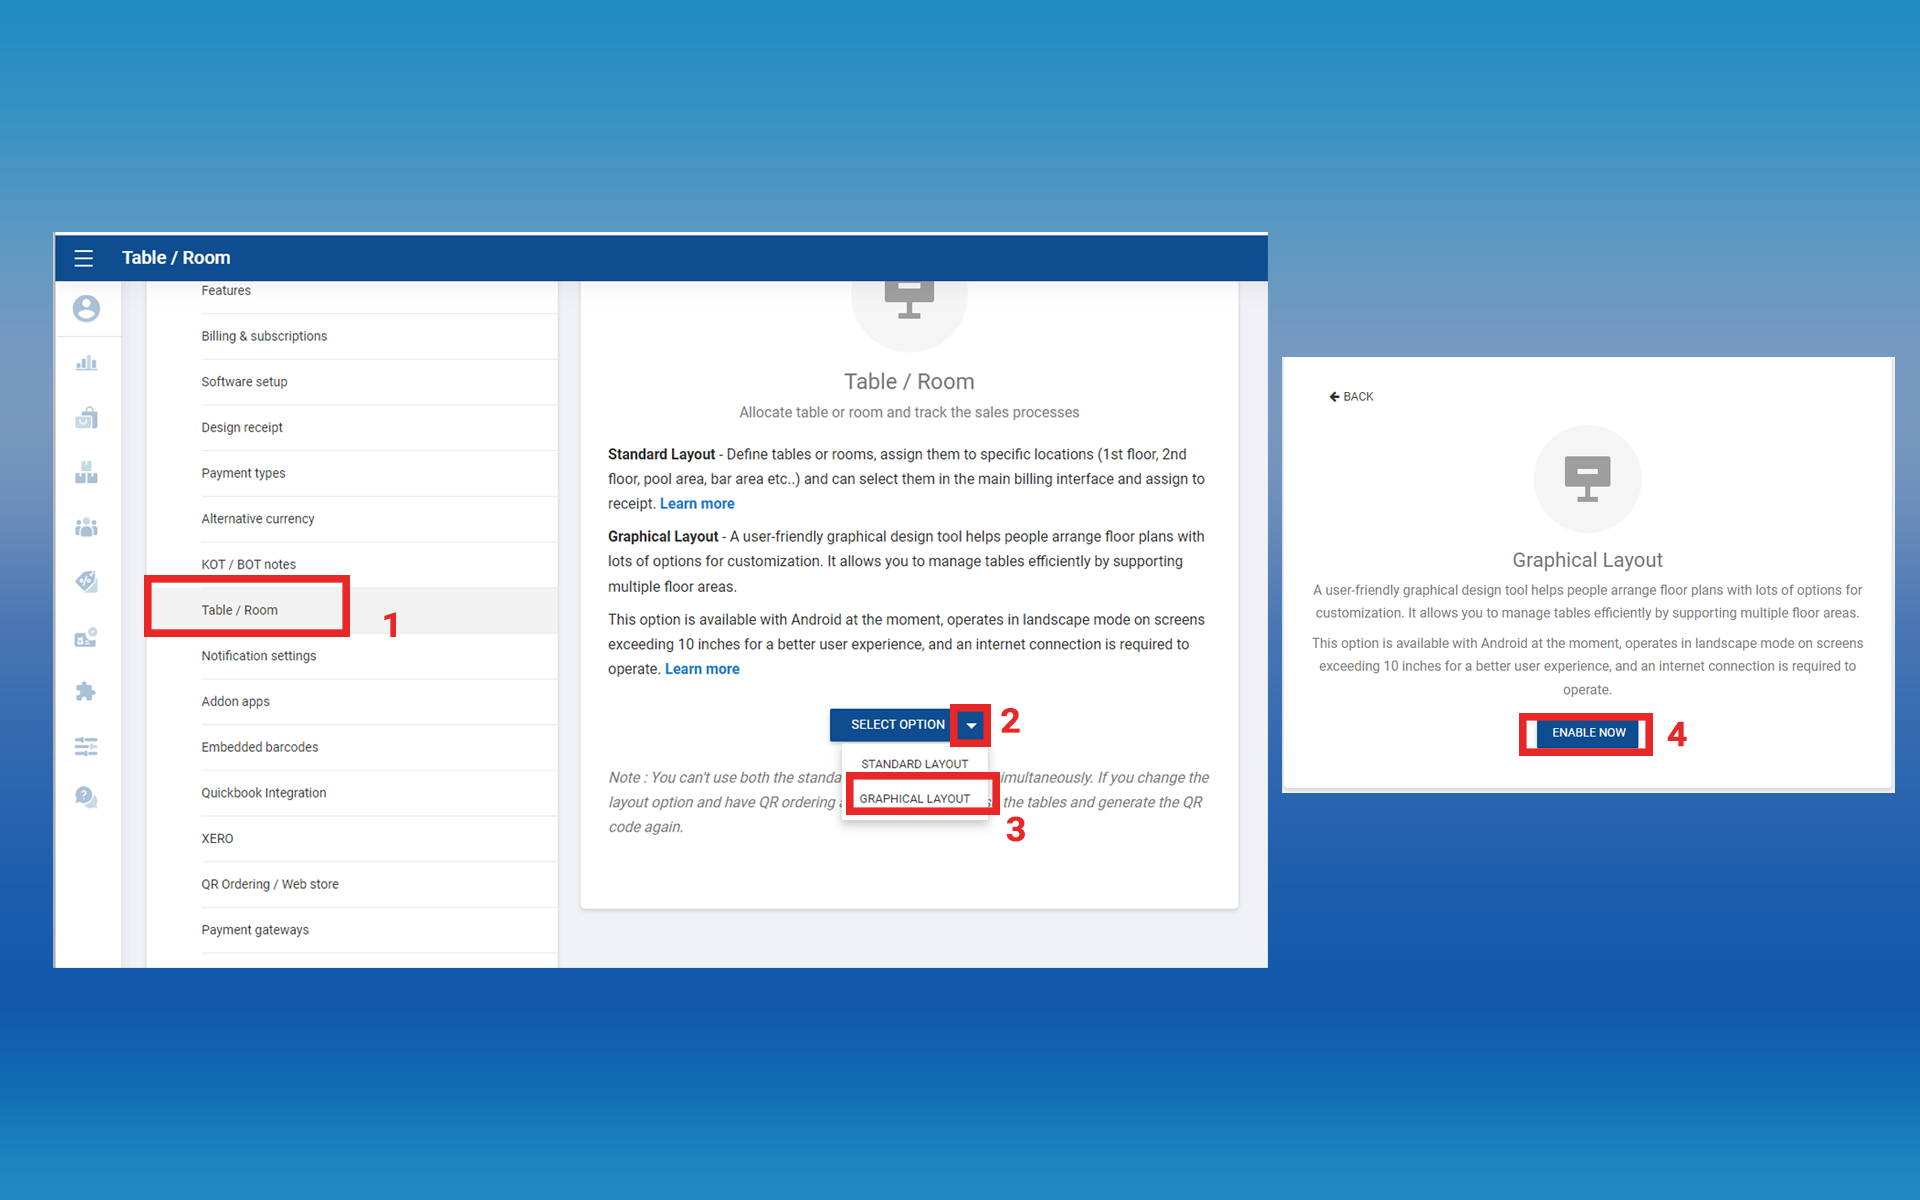
- Click on Table / Room feature > Select Graphical Layout from the dropdown > Click Enable Now.
- It will appear as a Table Icon in the POS app’s billing interface.
Step 3: Create Tables and Floors in POS
- Click Edit > Use Floor to create floors.
- Use Table to create tables.
- Use Decoration to add decorative elements.
- Click Save to store changes.
Step 4: Add a Table to a Receipt
- POS App main menu > Select New Sale > Click the Table icon.
- Click an available table (White color).
- Select items the customer ordered > Click Save.
- To add more items: Click Open Bills, select the table, click Edit, add items > Click Update.
- To finish the receipt: Click Open Bills, select the table > Click Charge.