In SalesPlay POS, a Shop represents a business branch or location, while a Device refers to a POS terminal used in a specific shop. This setup allows centralized management of multiple locations and efficient handling of transactions.
Update or Create Shops
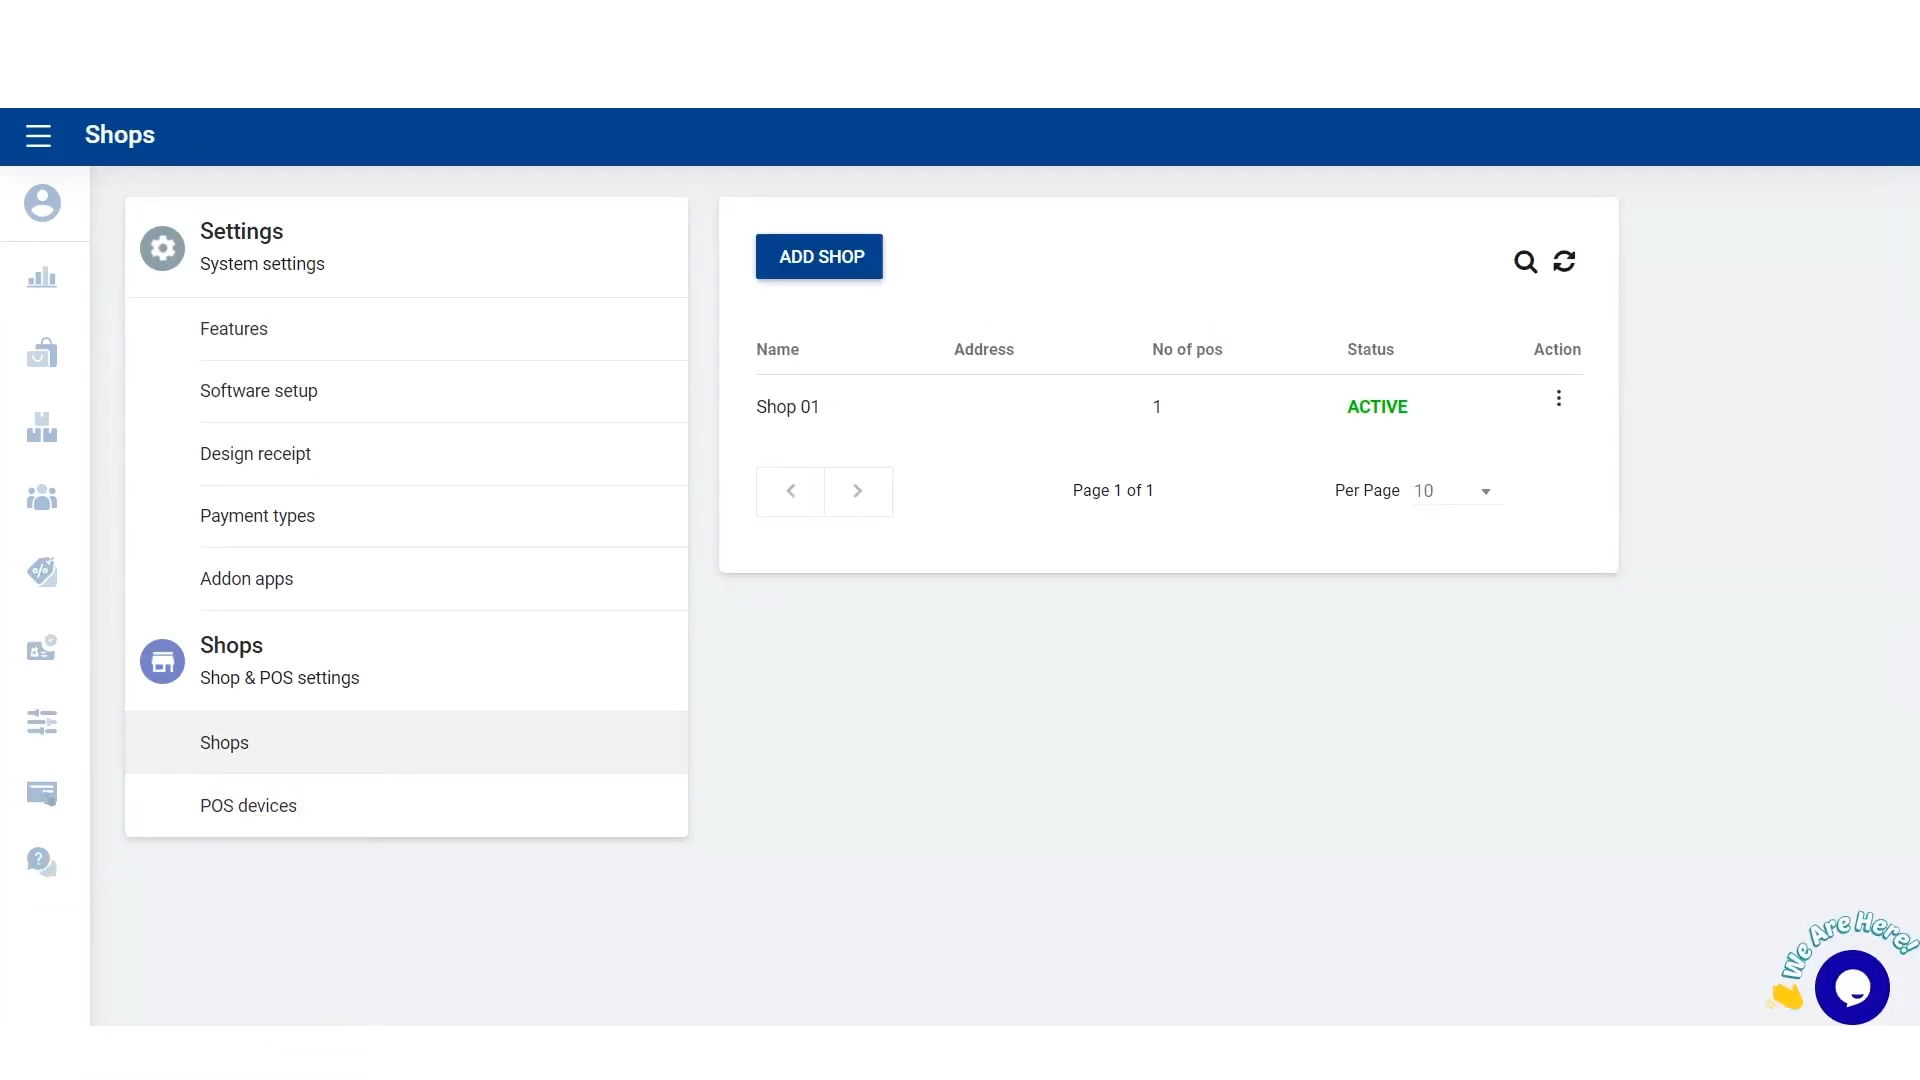
- Go to Main Menu > Settings > Shops and select the particular shop you want to update.
- Fill in the shop details and click UPDATE.
- To create a new shop, click ADD SHOP, fill in the required details, and click SAVE.
Add or Update POS Devices / Terminals
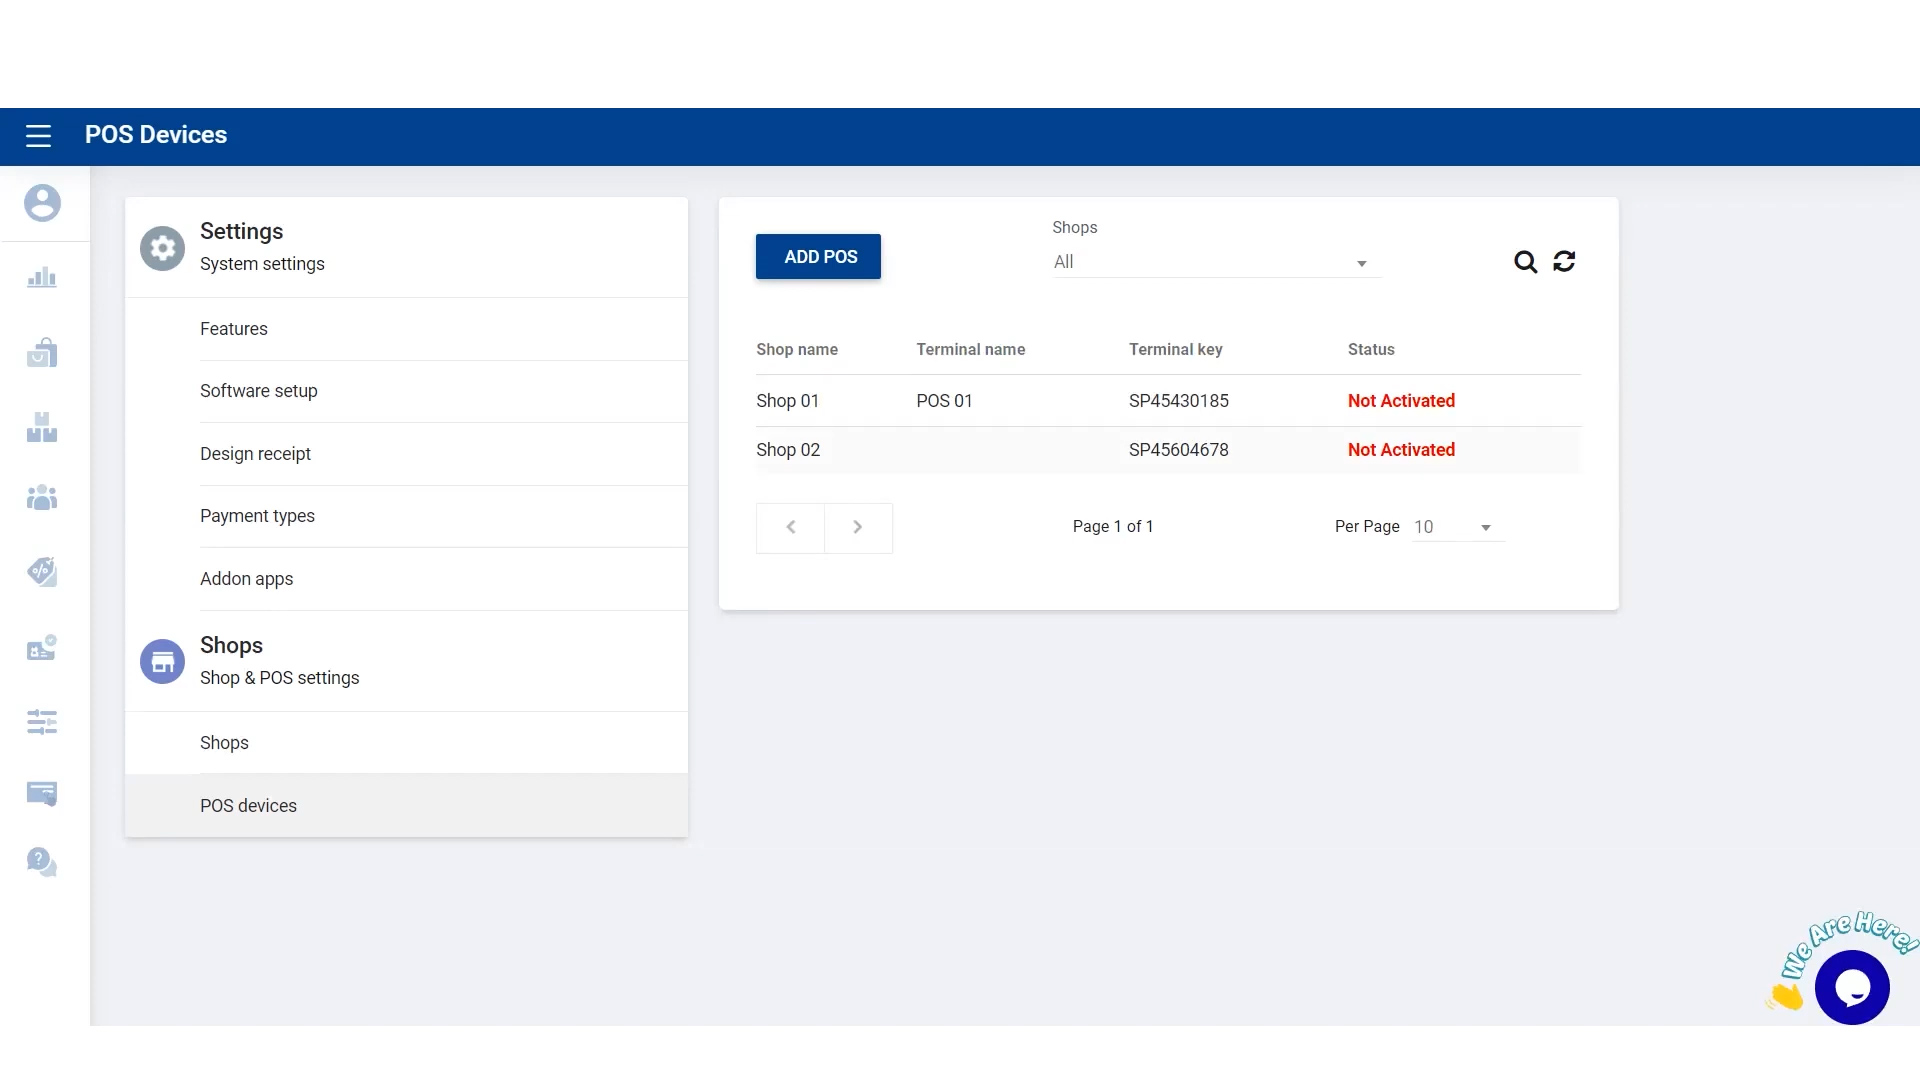
- Go to Shop and POS Settings > POS Devices and select the particular shop.
- Add a terminal name and click UPDATE.
- Activate the terminal using the Sign-in option.
- In TERMINAL INFORMATION, select the particular shop and terminal.
Terminal Activation
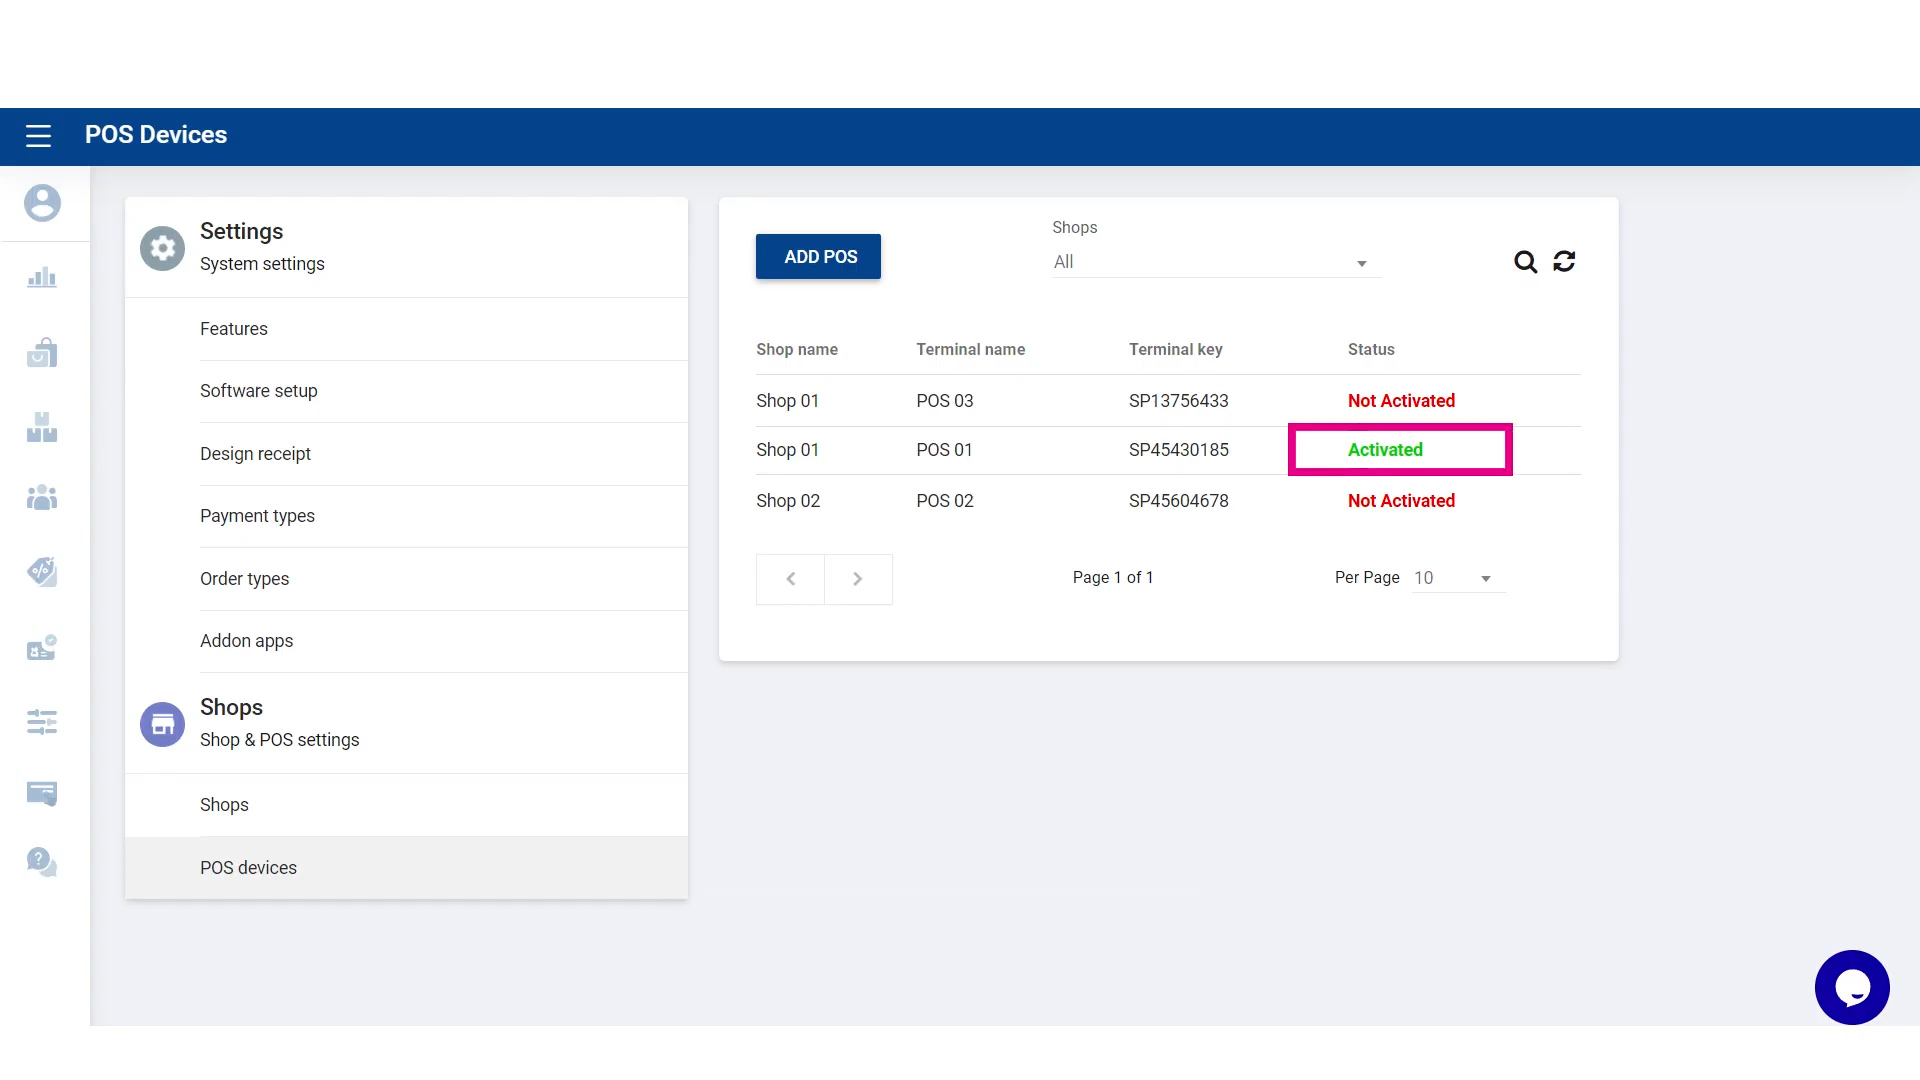
Once the terminal is successfully signed in, it will be activated in the Back Office, ready to process transactions.
Tips for Managing Multiple Shops and Devices
- Ensure each device has a unique terminal name for easier tracking.
- Regularly update shop details and POS devices to reflect accurate business data.
- Activate new terminals immediately to avoid transaction delays.