Stripe is a secure online payment platform that allows businesses to accept digital payments. SalesPlay POS supports Stripe integration with the Web Store feature, allowing customers to make online payments when placing orders.
This guide explains how to connect Stripe with SalesPlay Web Store and enable online payments.

Step 1: Enable Payment Gateways
- Log in to the SalesPlay Back Office Web Portal.
- Go to Settings.
- Select Features.
- Enable Payment Gateways.
- Click Save.
After enabling, Payment Gateways will appear under Settings with a NEW label.
Step 2: Add Stripe as a Payment Gateway
- Go to Settings > Payment Gateways.
- Click Add Payment Gateway.
- Select Stripe from the payment gateway list.
- Enter your Stripe Secret Key.
- Enter the Webhook Signing Secret.
- Copy the generated Webhook URL and add it to your Stripe Dashboard.
- Select the required Currency.
- Make sure the status is set to Available.
- Click Save.
Step 3: Add Stripe as a Payment Type for Web Store
- Go to Settings > Payment Types.
- Click Add Payment Type.
- Enter a payment name (Example: Stripe Online Payment).
- Select the relevant Payment Type Category.
- Open Additional Options.
- Enable QR/Web Store.
- Click Save.
Step 4: Enable Open Orders
Open Orders must be enabled for Web Store online payments.
- Go to Settings.
- Select Features.
- Enable Open Orders.
- Click Save.
Step 5: Set Up SalesPlay Web Store
Before connecting Stripe, make sure the Web Store / QR Ordering feature is enabled.
If you already have a Web Store, you can edit it and enable online payments.
Edit an Existing Web Store
If you already have a Web Store:
- Go to QR Ordering / Web Store.
- Select your existing Web Store.
- Enable Accept Payment Online.
- Select Stripe as the payment method.
- Save the changes.
Create a New Web Store
- Log in to the SalesPlay Back Office Web Portal.
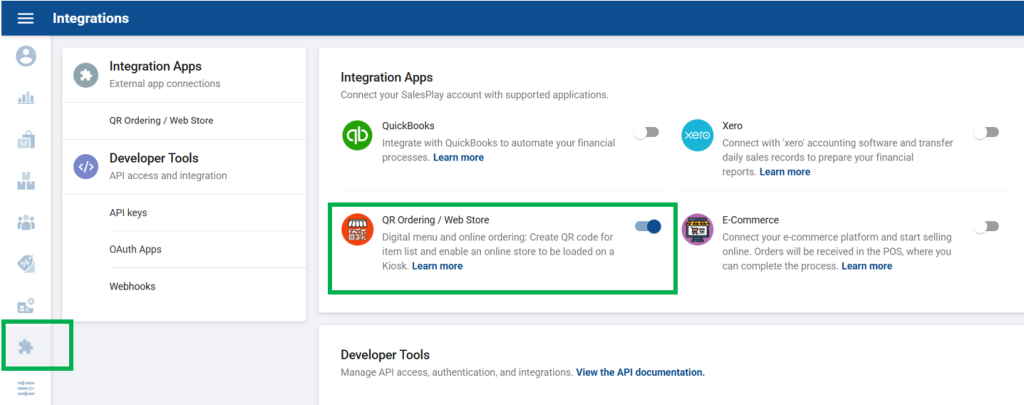
- Go to Integrations.
- Enable QR Ordering / Web Store.
- Open QR Ordering / Web Store from the Integration menu.
- Click Generate QR / Create Web Store.
- Select Web Store URL.
- Enter a name for your Web Store.
- Select the required Shop and Terminal.
- Enter the store name (this will be shown to customers).
- Select the required Order Type.
- Upload your store logo.
- Set your store opening and closing times.
- Enable Collect Customer Information (optional).
- Enable Accept Payment Online.
- Select Stripe under Ecommerce Payment Type.
- Click OK.
- Turn the Web Store status ON.
- Click Save.
After saving, your Web Store URL will be created.
Share Your Web Store Link
- Copy your Web Store URL from the Back Office.
- Share the link with your customers.
Customers can open the Web Store, add items to their cart, and complete their order using Stripe Online Payment at checkout.
Your SalesPlay Web Store is now ready to accept online payments through Stripe.