• Point of Sale
  • Categories
    • Getting Started with SalesPlay
    • Web POS
    • Sales
    • Product
    • Inventory
    • User
    • Customers
    • Reports
    • Settings
  • Community
  • Point of Sale
  • Categories
    • Getting Started with SalesPlay
    • Web POS
    • Sales
    • Product
    • Inventory
    • User
    • Customers
    • Reports
    • Settings
  • Community
Home/Knowledge Base/Customers/How to Add Customer to the Receipt

How to Add Customer to the Receipt

SalesPlay makes it easy to add customers directly without navigating to the “Customer Profile” page. Follow these steps:

  1. Open the POS App and go to the Main Menu.
  2. Select New Sale.
  3. Click the Customer icon located in the upper-right corner.
  4. Search for the relevant customer using the search bar.
  5. Click the ( + ) icon next to the customer’s name to add them directly.
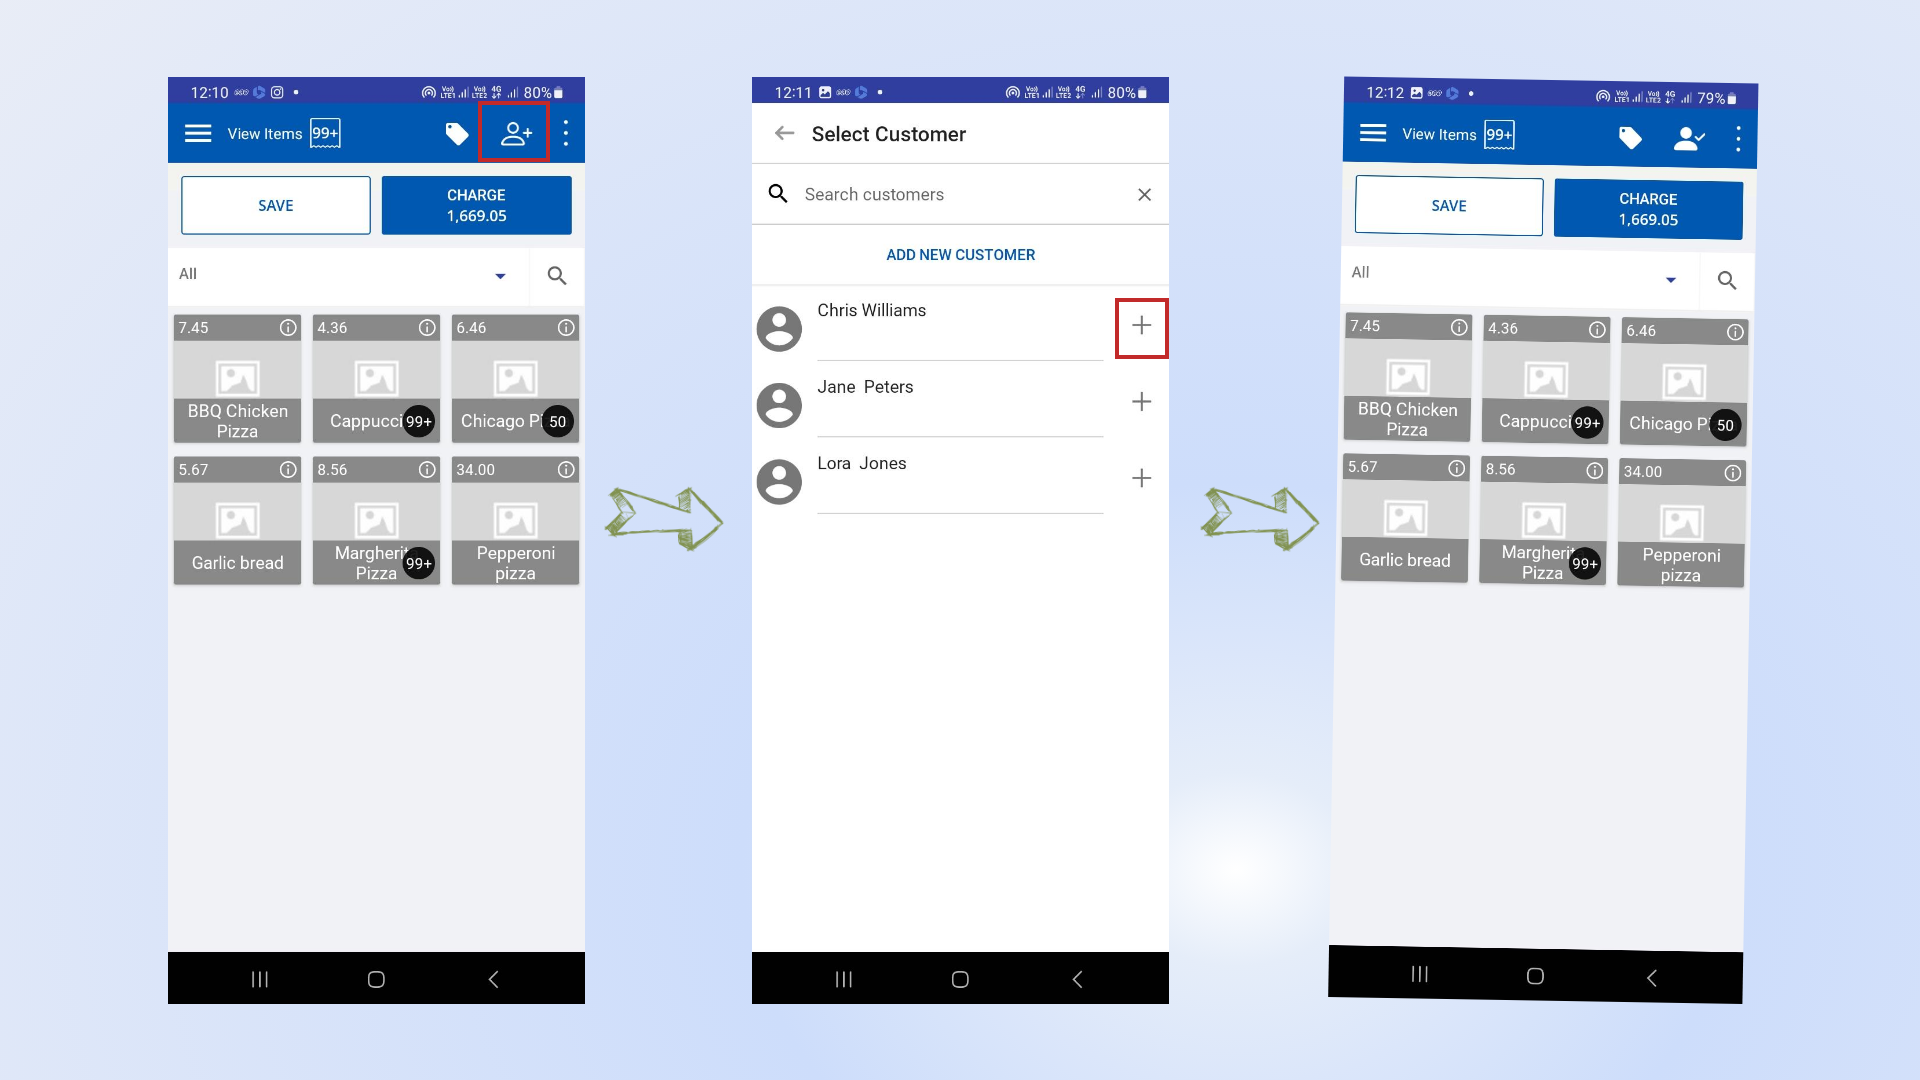
 

Add Customer to the Receipt
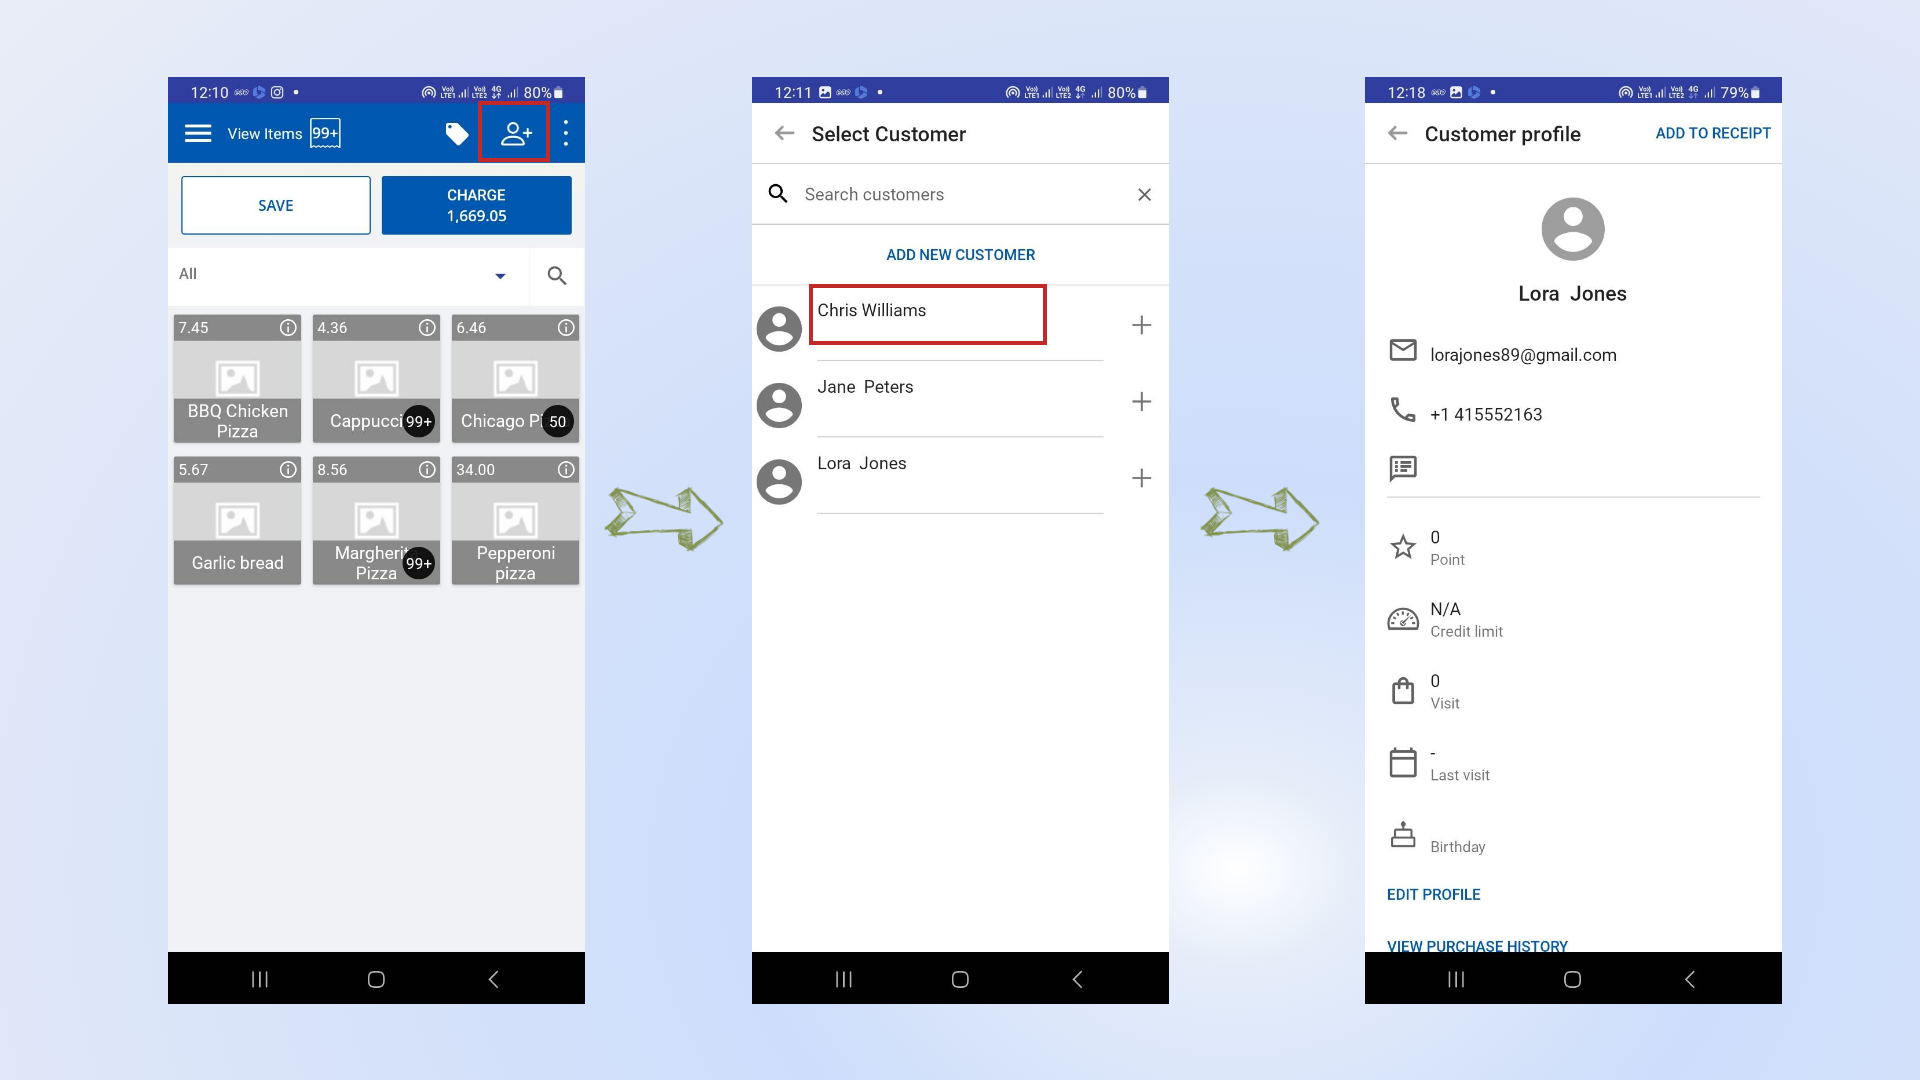
 

To view a customer’s profile:

  • Simply click on the customer’s name in the POS interface.

Was this helpful?

Yes  No

No luck finding what you need? Contact Us

Still need help?

Contact Us

Our support team is
here for you!

Ask the Community

Connect and get answers
from fellow SalesPlay POS users.

Asset-3-3.webp
  • Privacy Policy
  • Terms & Conditions
  • Return & Refund Policy
Asset-3-3.webp
  • Privacy Policy
  • Terms & Conditions
  • Return & Refund Policy