• Point of Sale
  • Categories
    • Getting Started with SalesPlay
    • Web POS
    • Sales
    • Product
    • Inventory
    • User
    • Customers
    • Reports
    • Settings
  • Community
  • Point of Sale
  • Categories
    • Getting Started with SalesPlay
    • Web POS
    • Sales
    • Product
    • Inventory
    • User
    • Customers
    • Reports
    • Settings
  • Community
Home/Knowledge Base/Product/How to Change Category Order in SalesPlay POS

How to Change Category Order in SalesPlay POS

Description

Businesses can easily customize their POS interface to display top-selling categories more prominently.
Reordering categories improves the cashier experience and speeds up the checkout process.
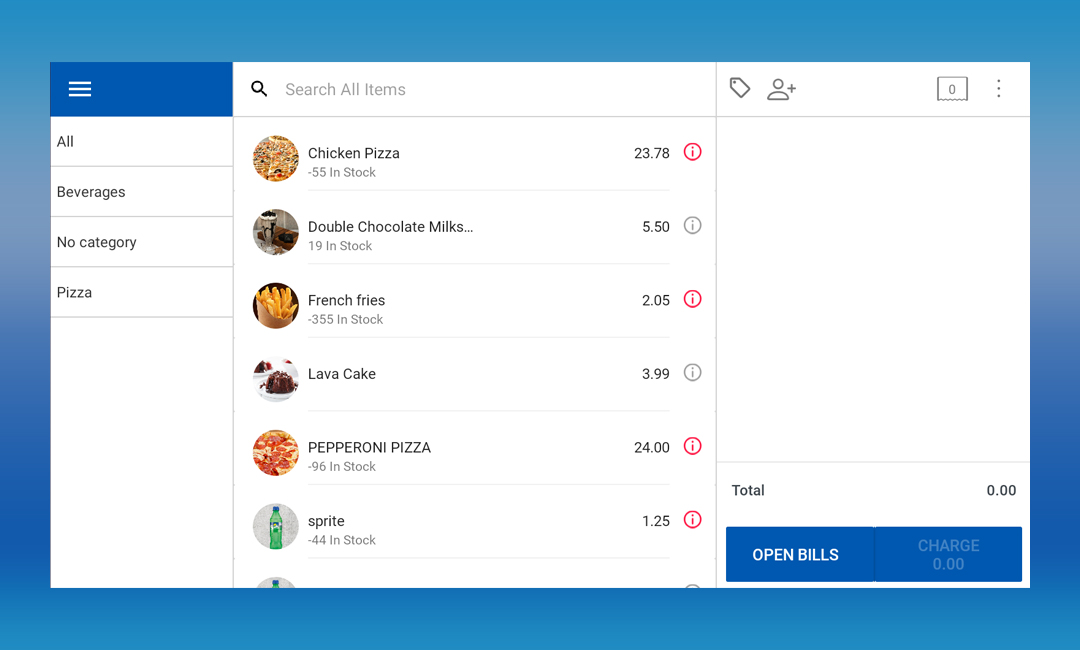

Category Order Overview

Step 1: Go to Categories in Back Office

Log in to the SalesPlay POS Back Office.
From the main menu, select Products, then click on Categories.
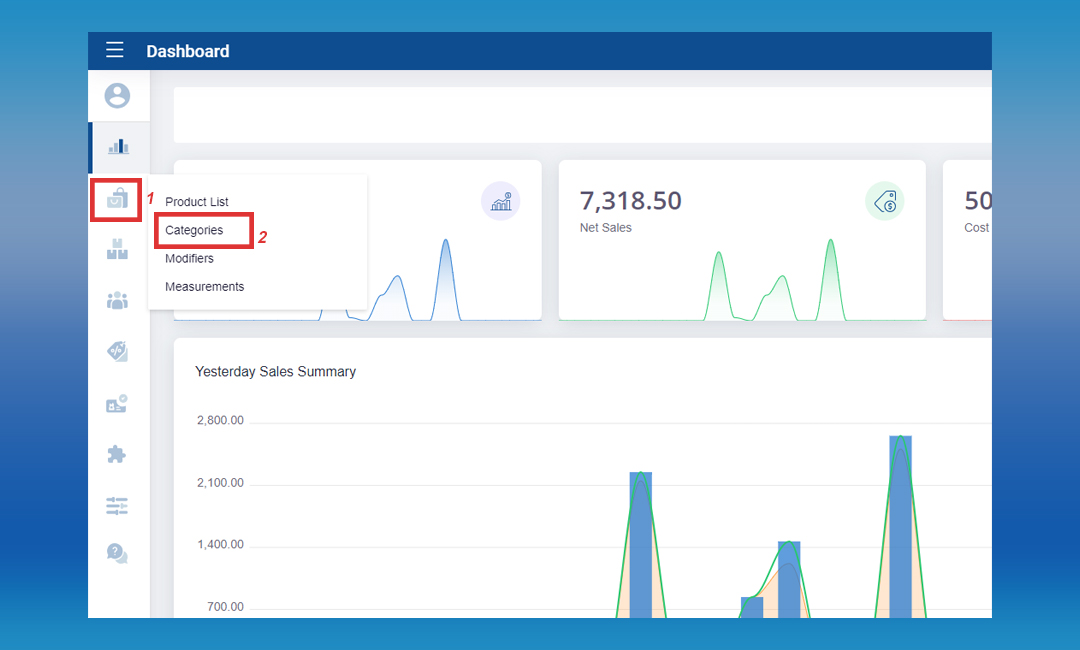

Navigate to Categories

Step 2: Select Change Order

Click the three-dot (⋮) menu next to the category section, then select Change Order.
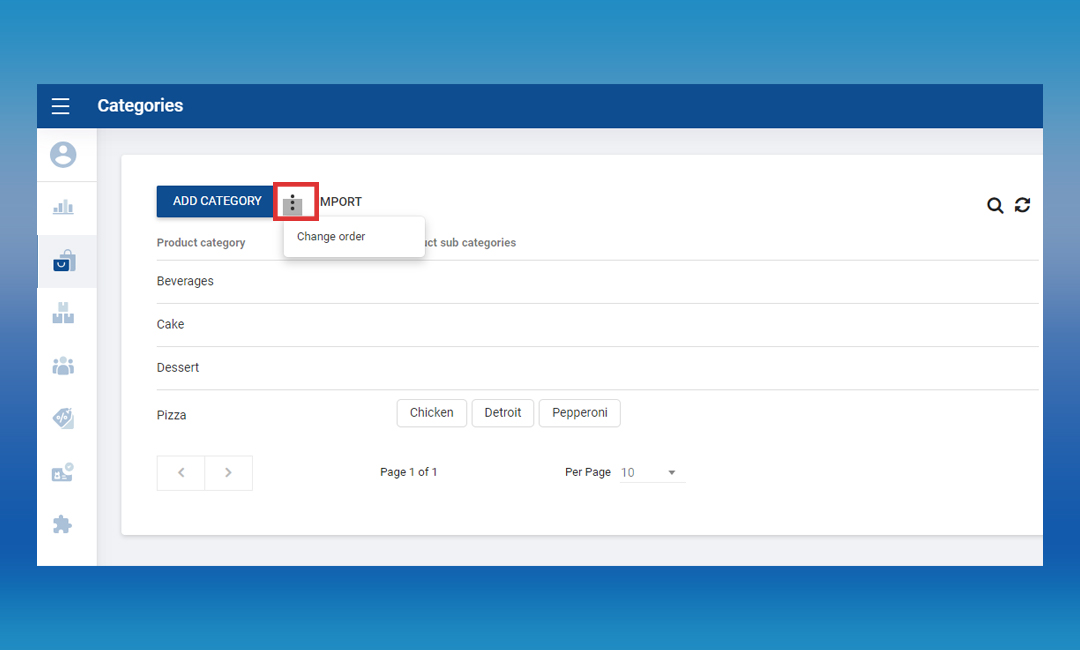

Change Category Order Option

Step 3: Drag and Drop Categories

Click and hold the burger icon (≡) next to the category name.
Drag and drop the category to rearrange it in your preferred order.
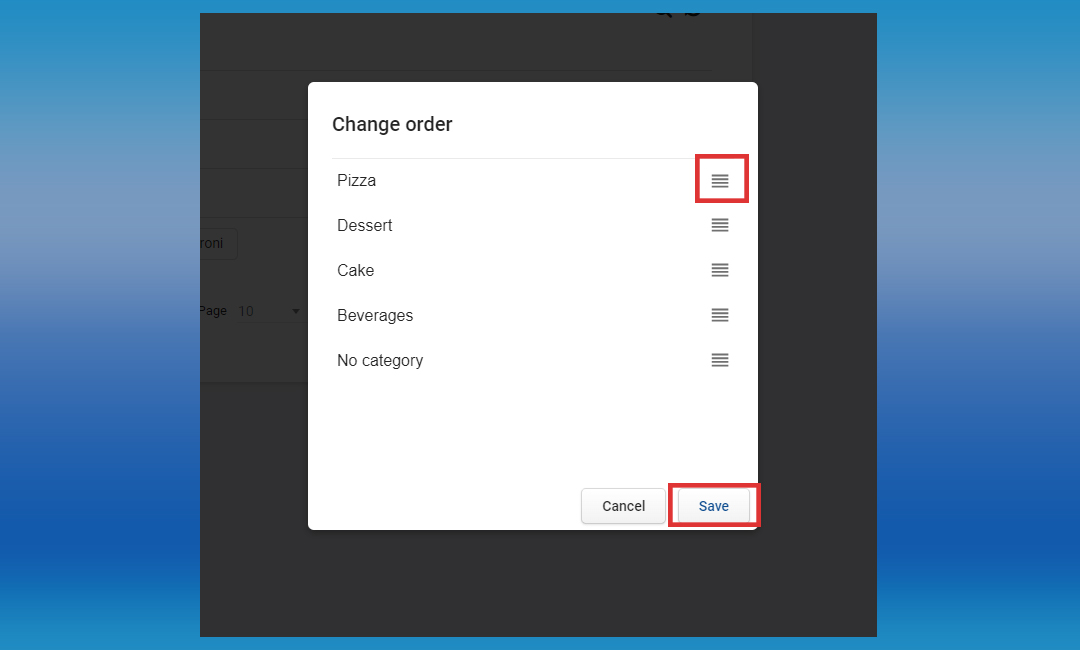

Drag and Drop Categories

Click the “Save” button to apply the changes.

Important Note
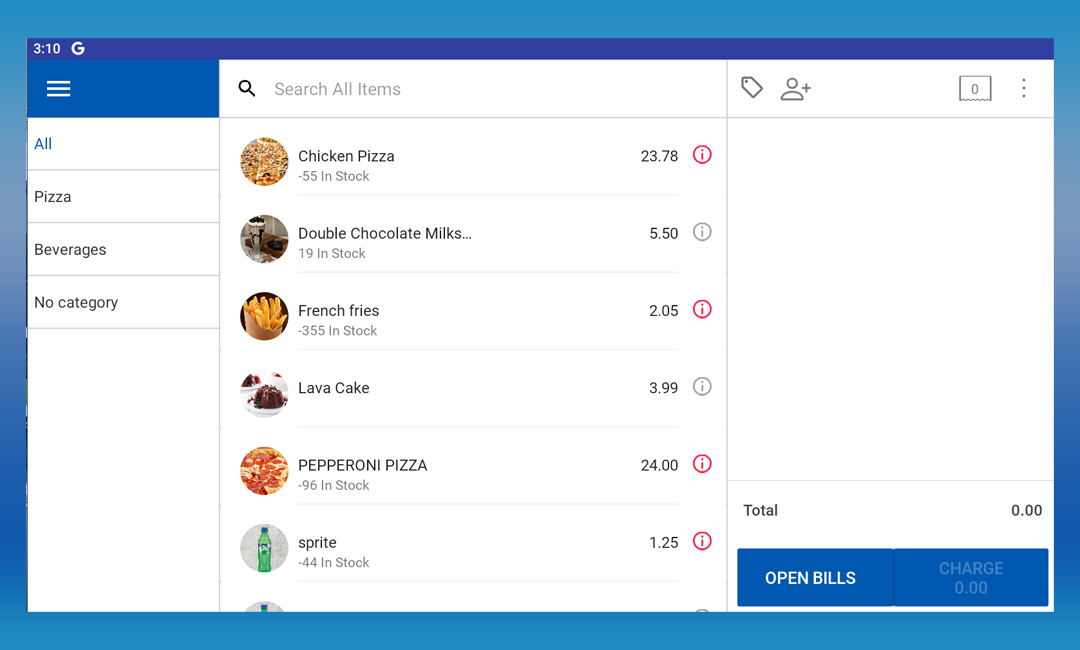

Category Order Note
  • This feature is available in both Android POS and Web POS versions.

Was this helpful?

1 Yes  No

No luck finding what you need? Contact Us

Still need help?

Contact Us

Our support team is
here for you!

Ask the Community

Connect and get answers
from fellow SalesPlay POS users.

Asset-3-3.webp
  • Privacy Policy
  • Terms & Conditions
  • Return & Refund Policy
Asset-3-3.webp
  • Privacy Policy
  • Terms & Conditions
  • Return & Refund Policy