1. Enable the Expiry Date Option in Back Office
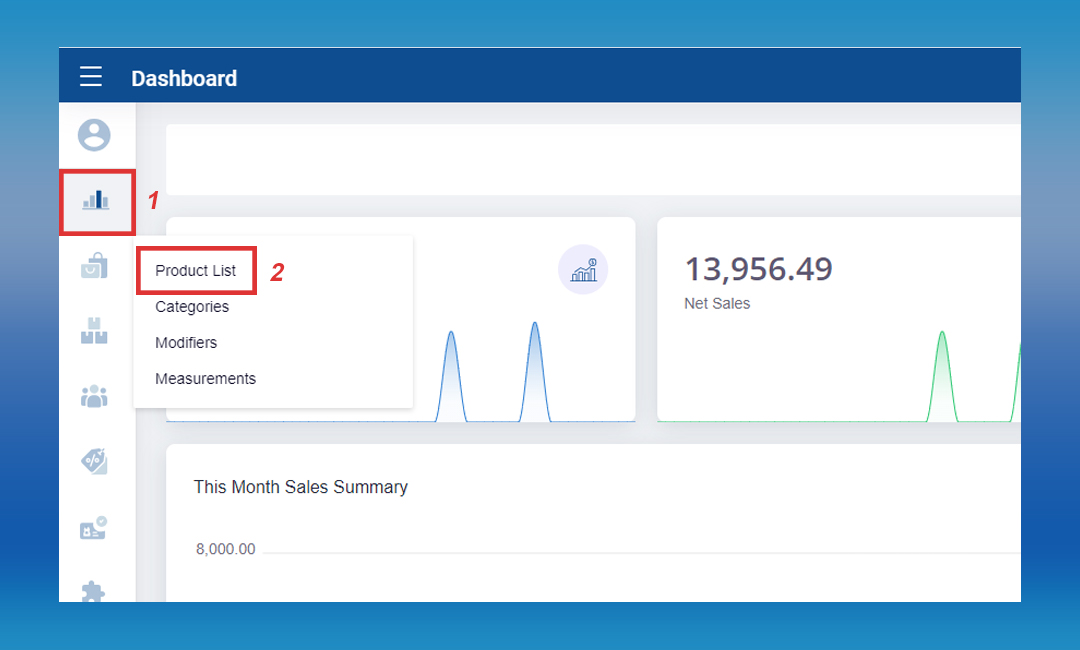
Log in to POS Back Office > Select Products from the main menu > Go to the Product List.
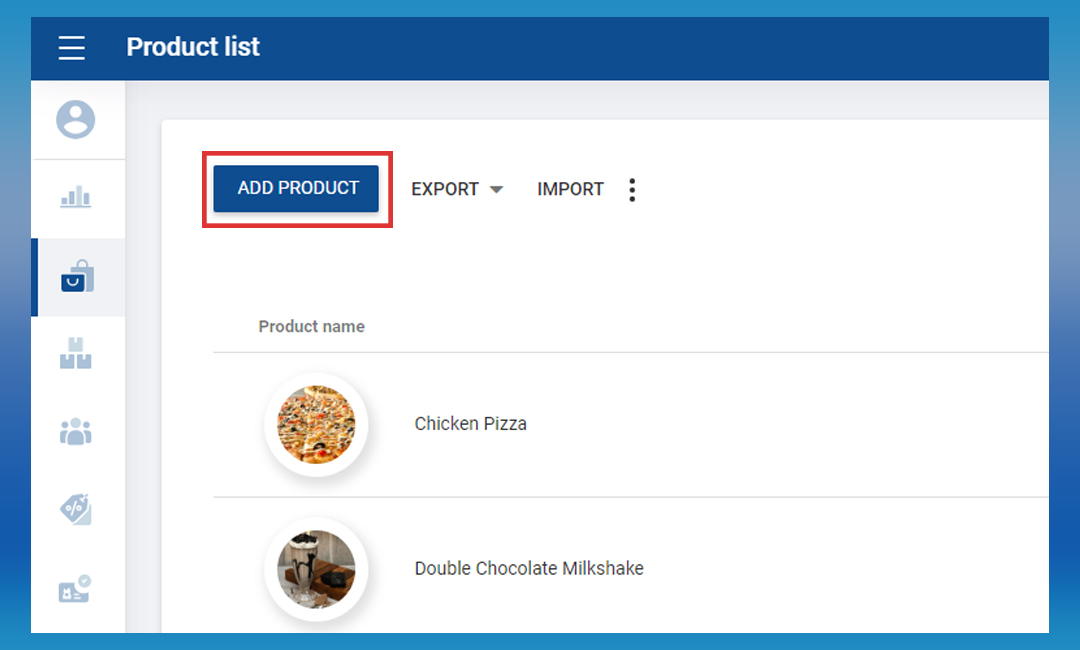
Click the Add Product button:
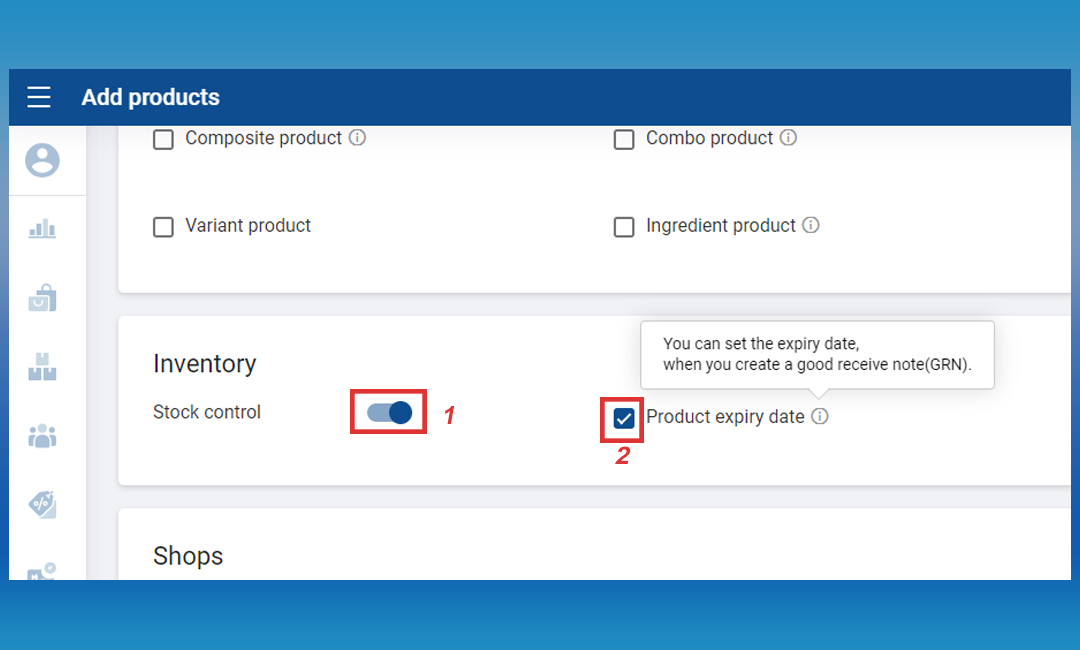
Enter product name and other details > Enable Stock Control > Tick ON Product Expiry Date.
Click “Save” to confirm.
2. Add Stocks (GRN) with an Expiry Date
Log in to Back Office > Select Inventory from the main menu > Go to Good Received Notes.
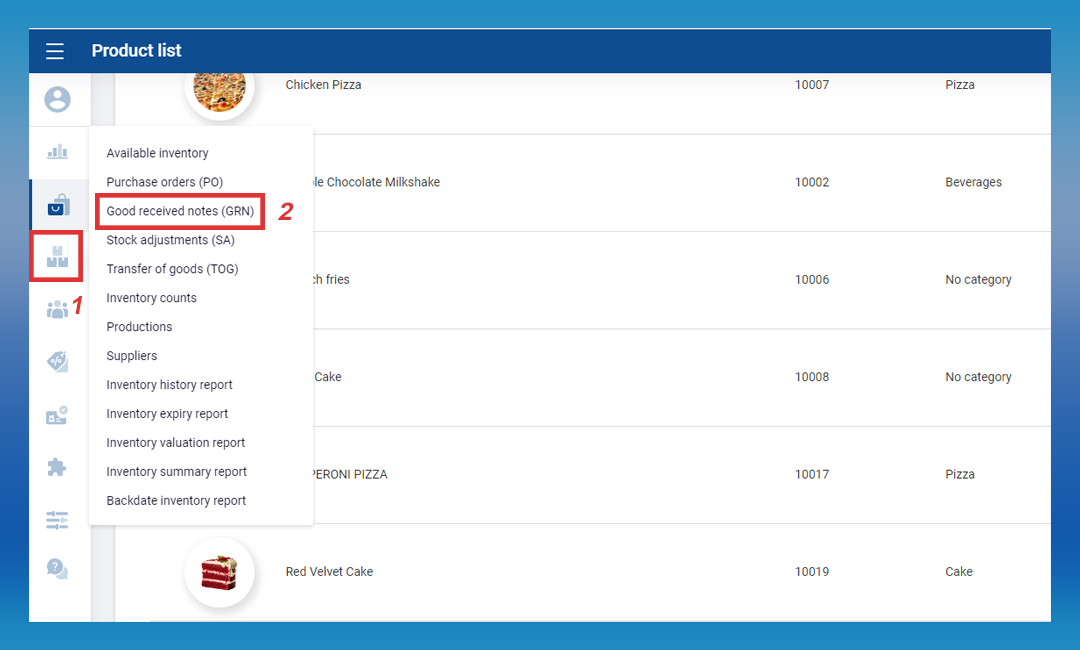
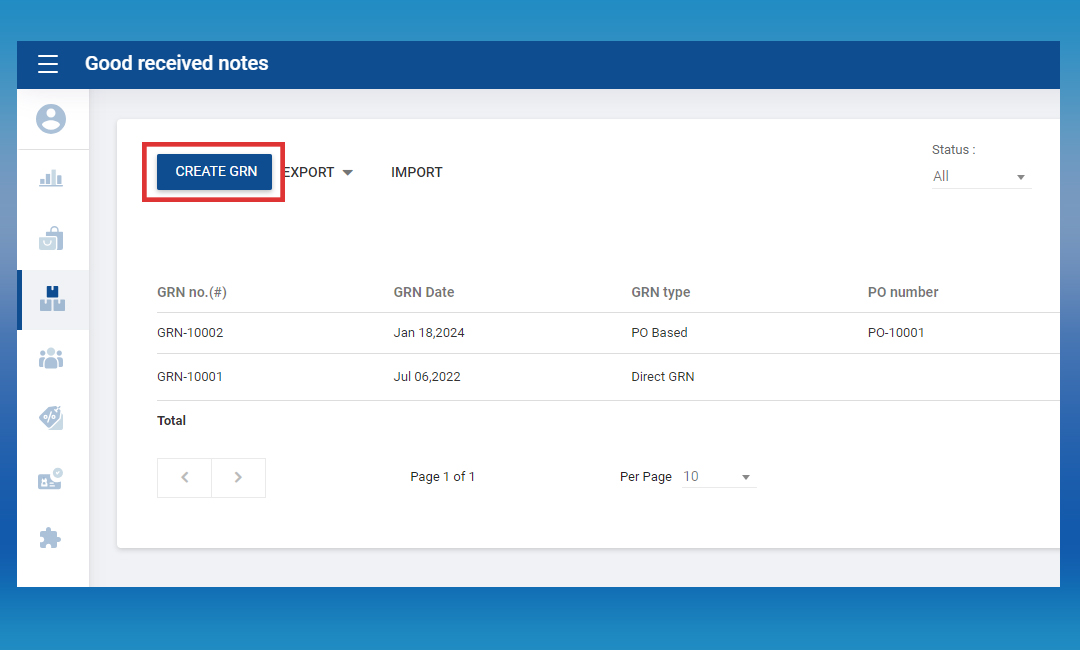
Click the Create GRN button:
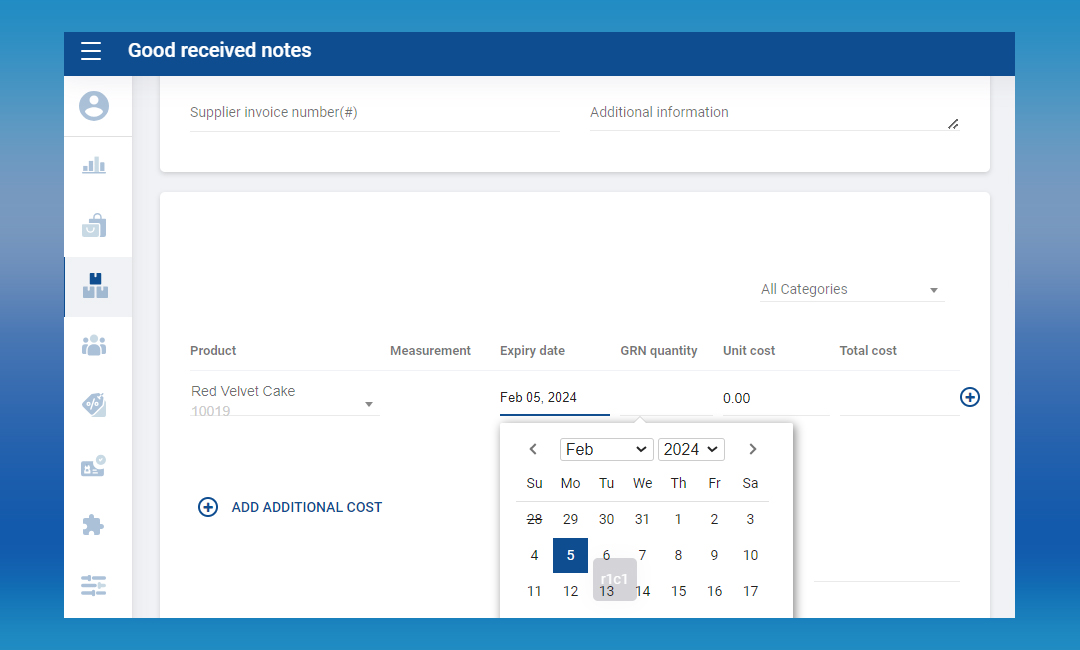
Select a product from the dropdown > Click Expiry Date > Choose the date from the calendar:
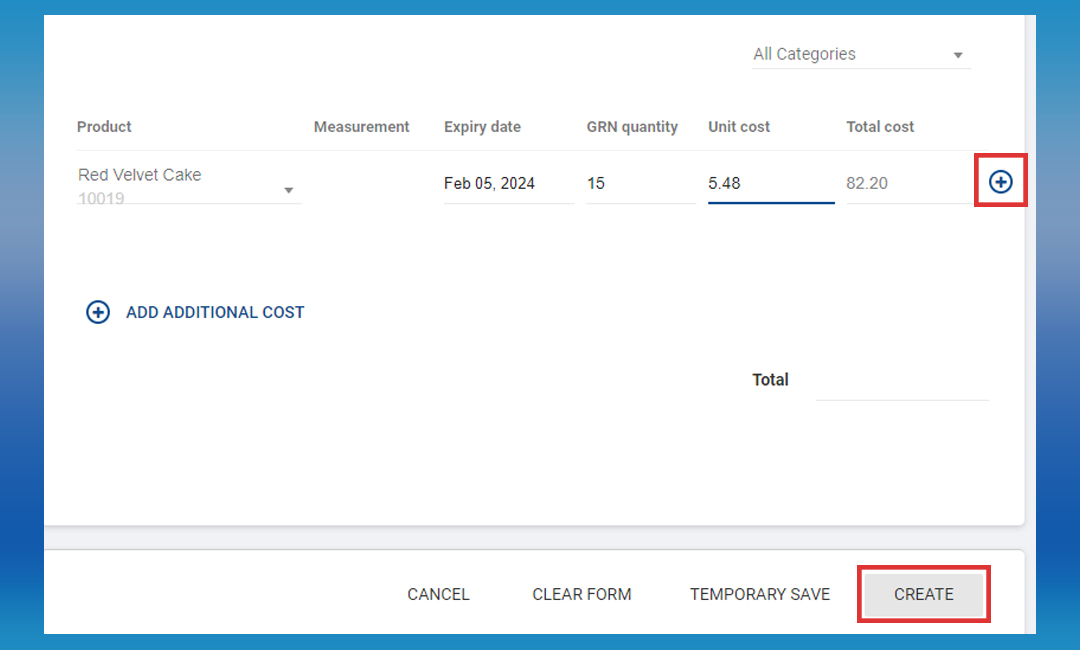
Enter GRN quantity > Click (+) > Click CREATE:
3. Check Inventory Expiry Report
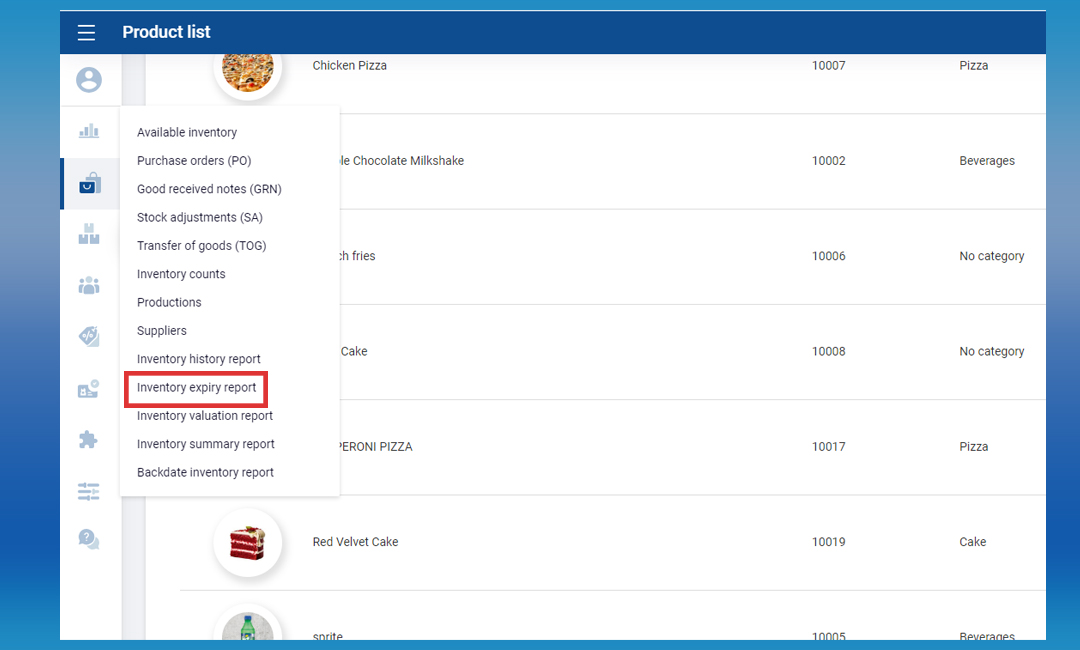
Log in to Back Office > Select Inventory from the main menu > Go to Inventory Expiry Report.
Click Export if you want to download the report as a PDF or CSV file.