Introduction
The SalesPlay KOT / BOT Display App helps kitchen and bar staff view customer orders clearly. It connects with the SalesPlay POS system, making food and drink preparation faster and more accurate.
Key Features
- Automatically shows orders from the POS.
- Displays waiting time for each order.
- Plays a sound when a new order arrives.
- Allows cancellation of single items or full orders.
- Compatible with SalesPlay Tablet Ordering System.
- Supports Dark Mode.
Download & Install
Install the app on your kitchen tablet: Download KOT / BOT Display App
Note: The setup for older versions is no longer supported. To avoid issues, update both the POS App and the KOT/BOT Display App to the latest version.
Setup Guide: https://help.salesplaypos.com/help/kot-bot-display-app
KOT/BOT App: Link
POS App: Link
Key Points to Remember
- Both the KOT display and POS device must be connected to the same network for proper operation.
Setup Steps
Step 1: Install & Open SalesPlay KOT/BOT Display
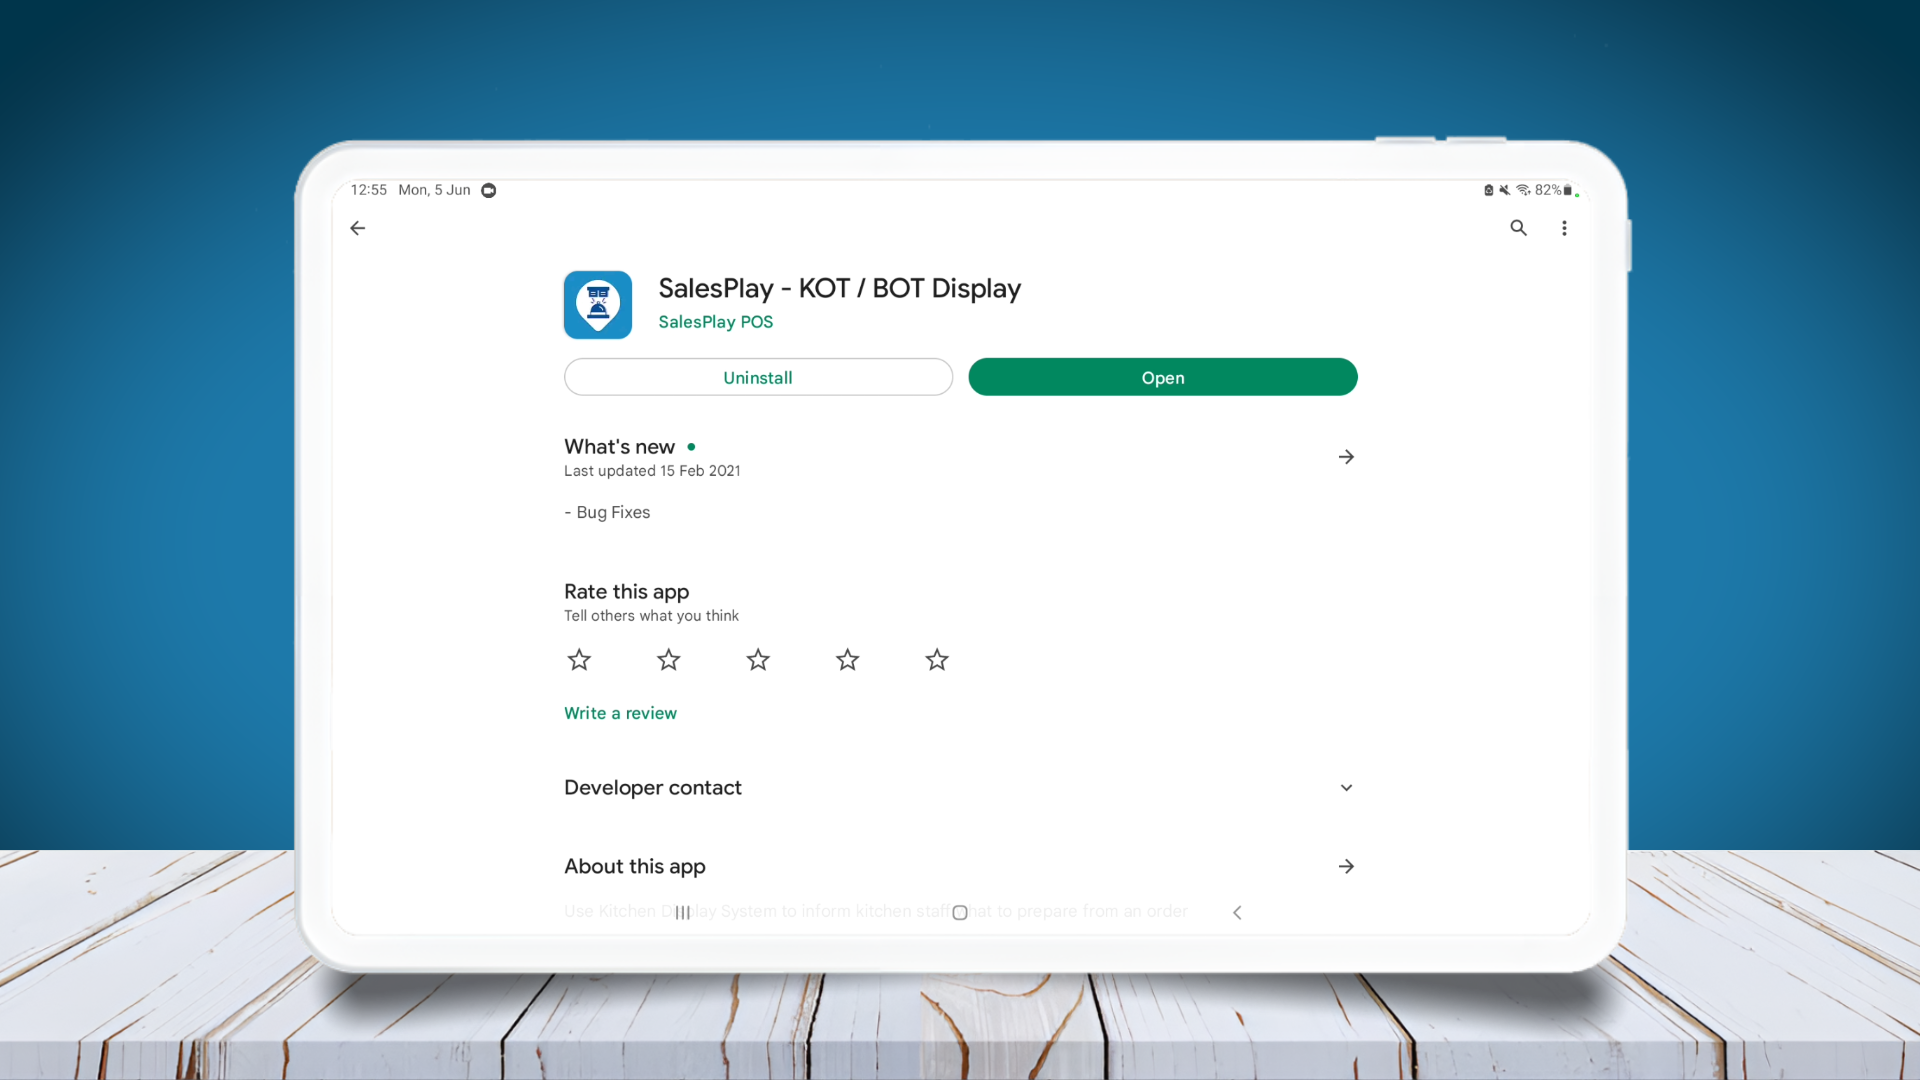
- Install the app from Google Play Store: Link
Step 2: Note Down the IP Address of the Device
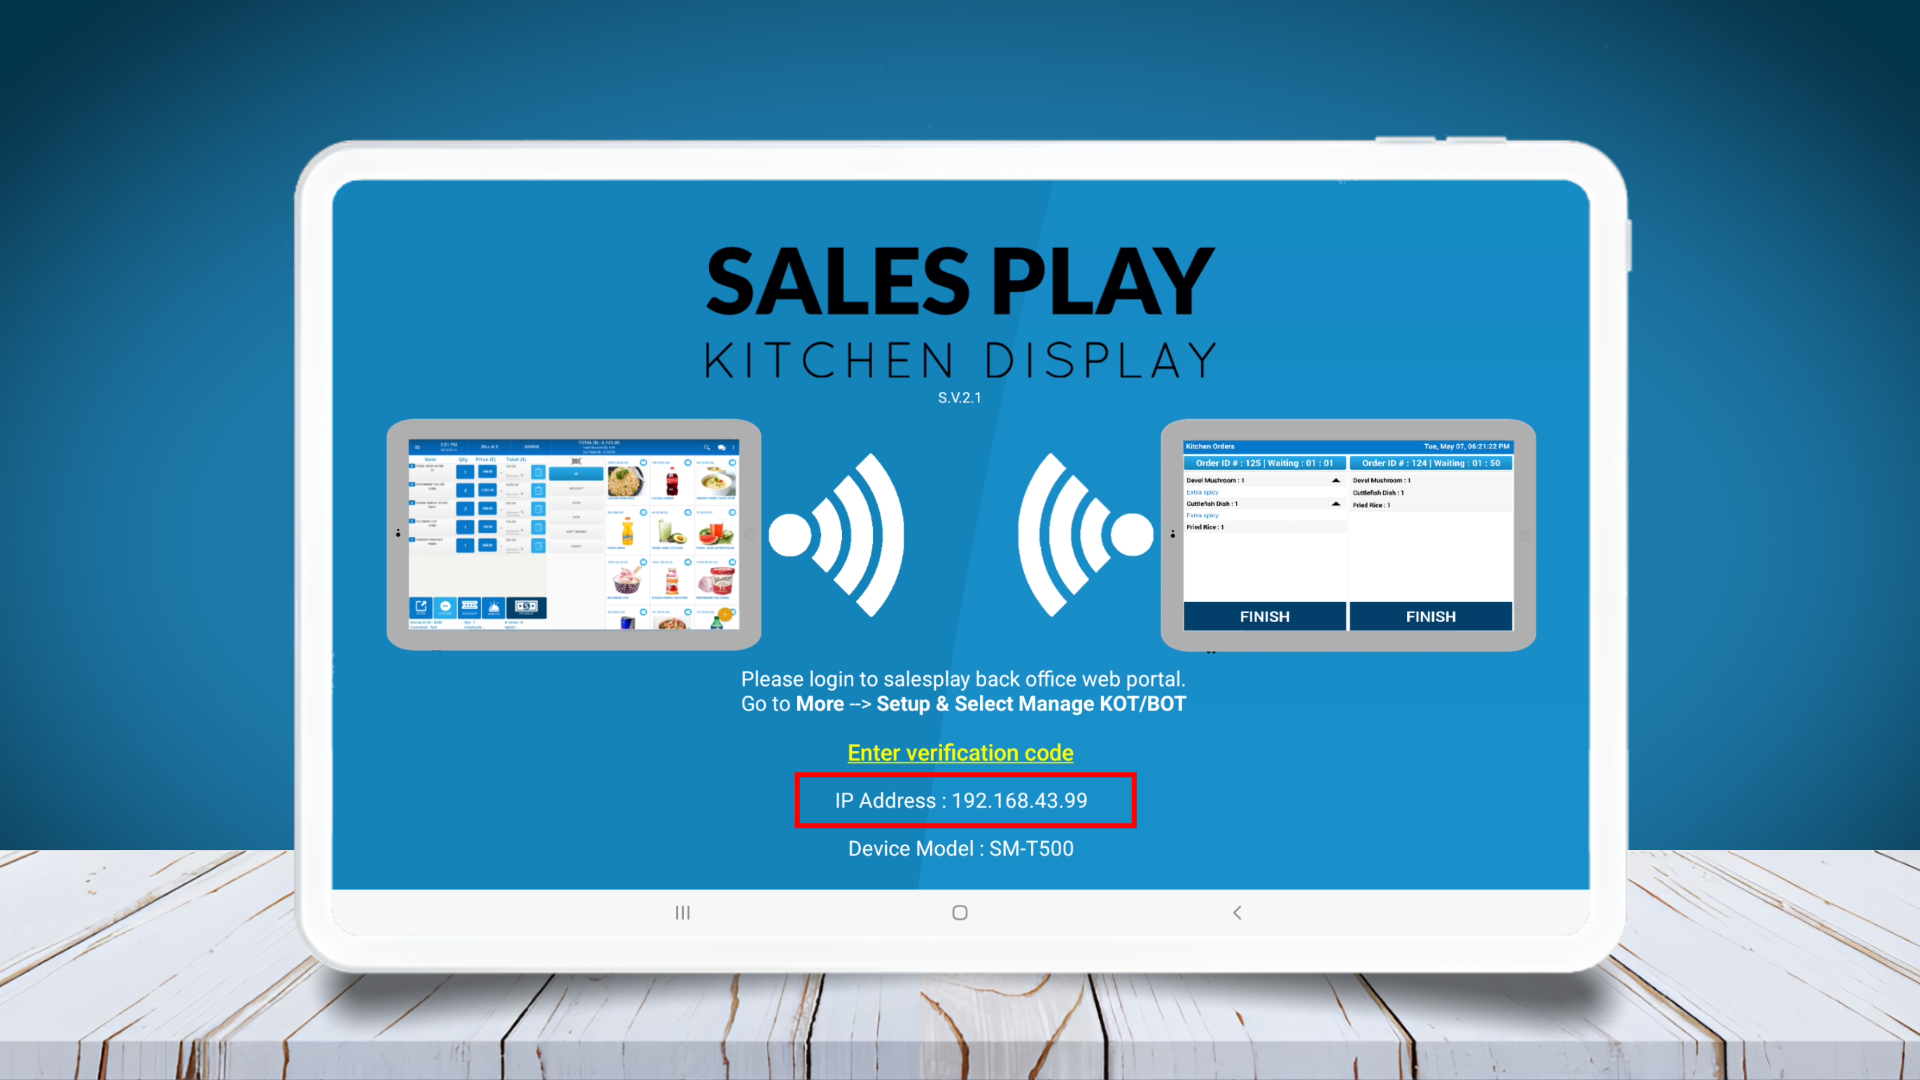
- Record the IP address; it will be required later.
Step 3: Enable Addon Apps
- Go to Back Office → Main Menu → Settings → Enable “Addon apps” → Click Save.
- After enabling, “Addon apps” will appear under Features in settings.
Step 4: Register Your Device in Back Office
- Navigate to Features → Addon apps → KOT/BOT devices → Click “REGISTER NEW”.
Step 5: Fill in Required Information
- Provide the required details to register the new device and save.
Step 6: Get the Verification Code
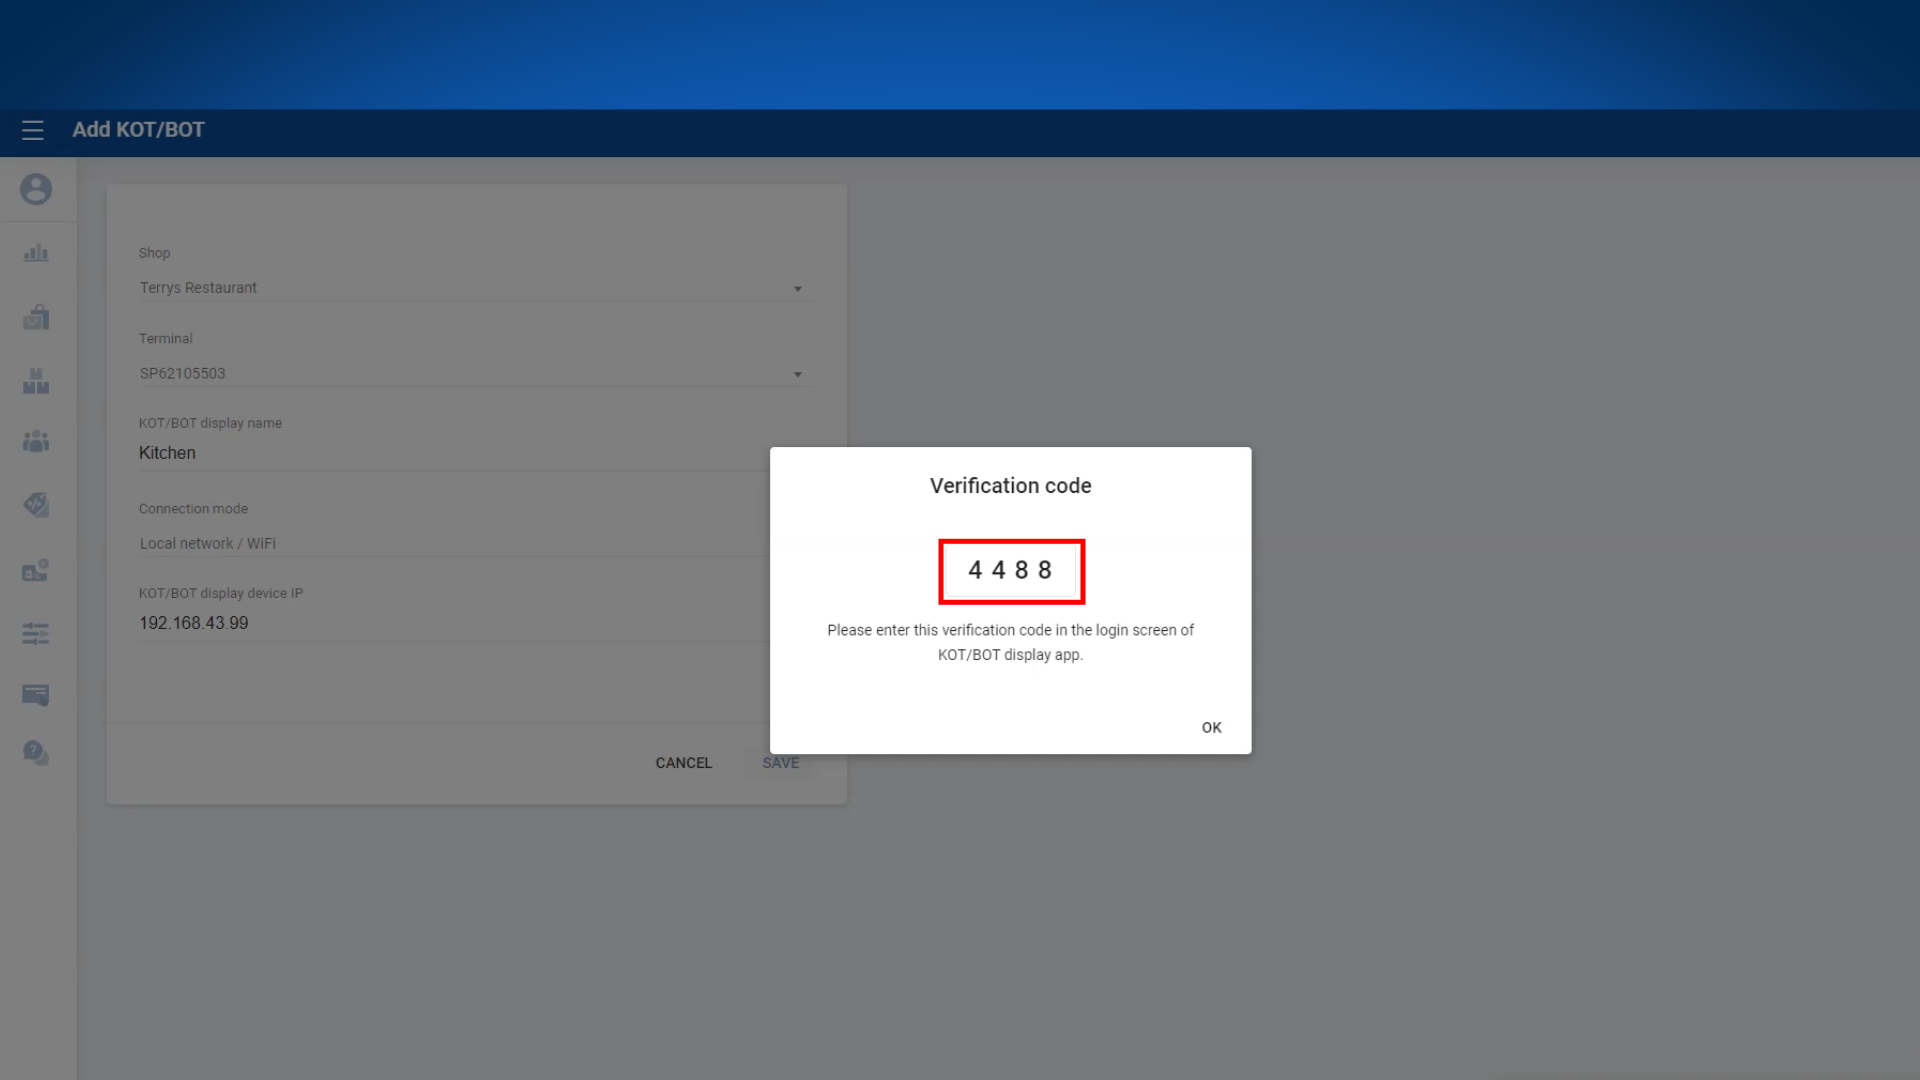
- After saving the device info, a verification code will be generated. Note it down carefully.
Step 7: Enter Verification Code in KOT Device
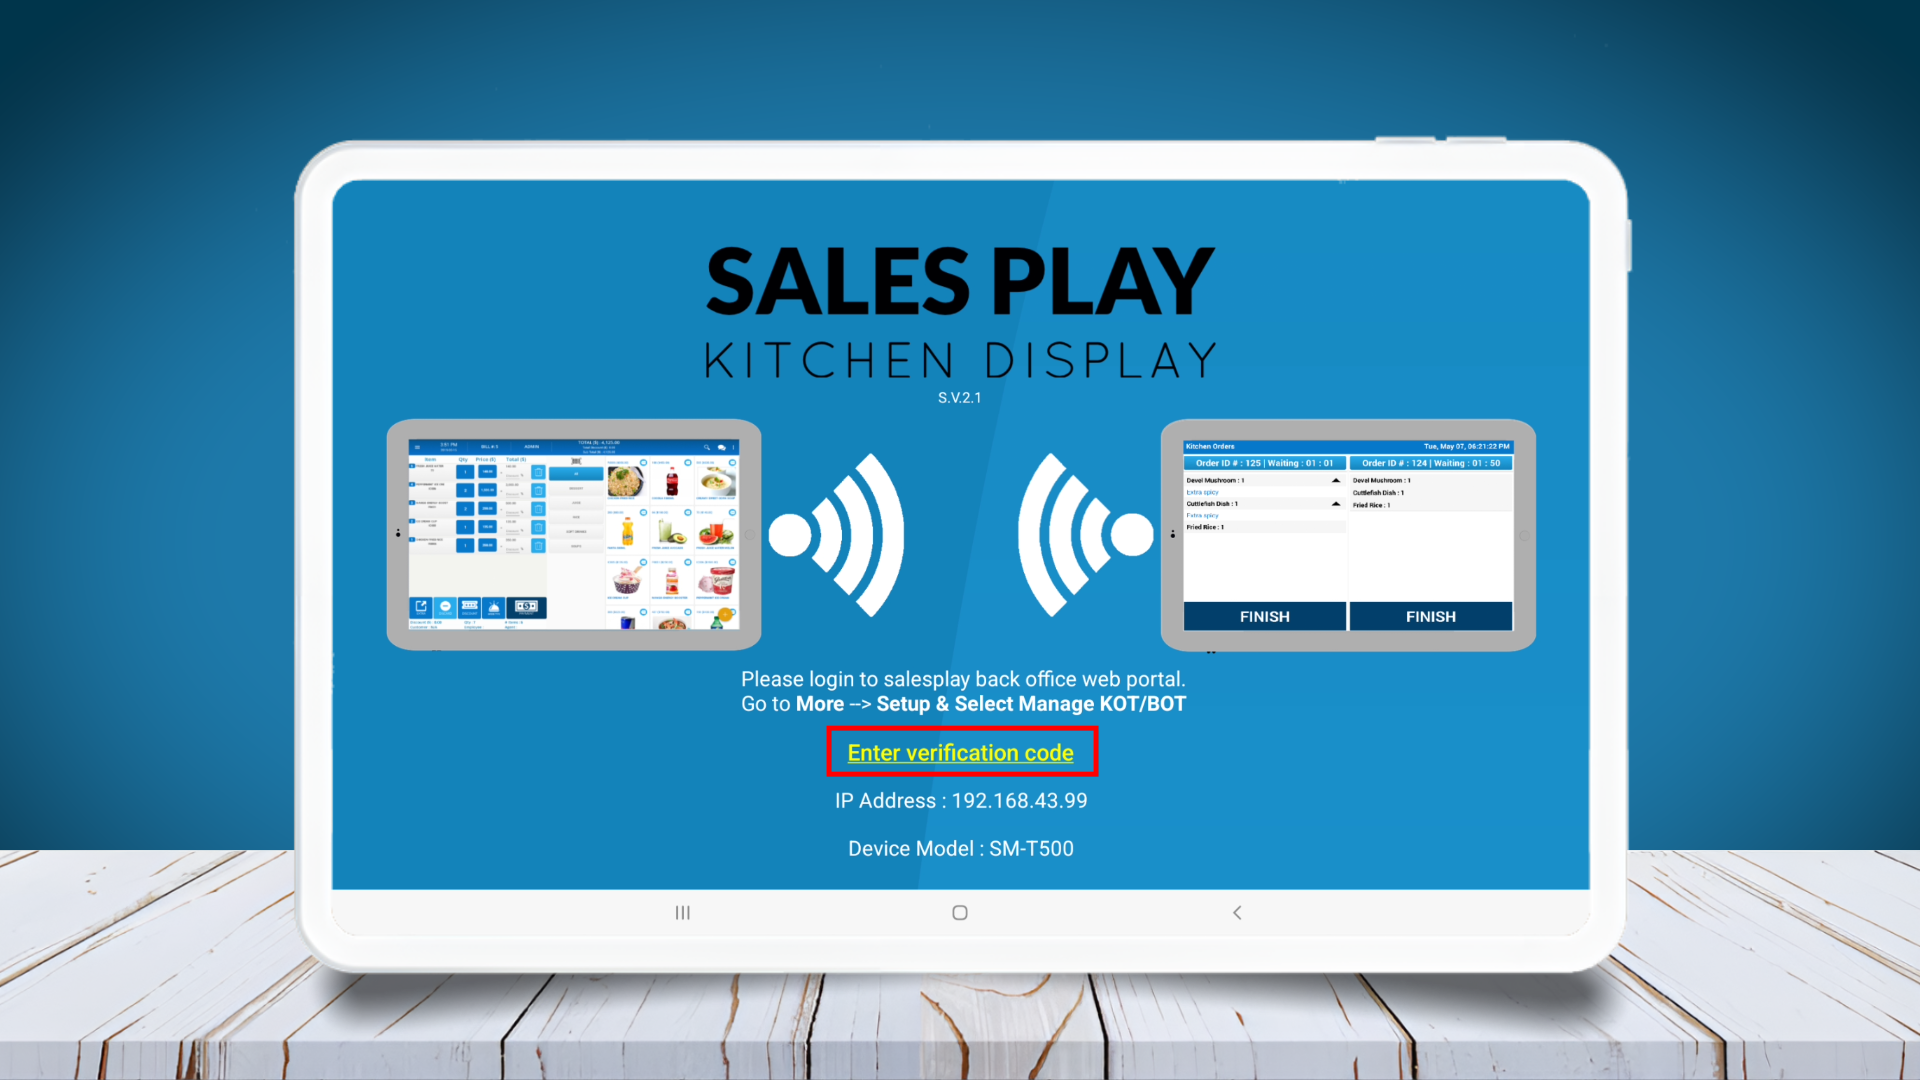
- Input the verification code into your KOT device to link it with the POS system.
Step 8: Confirm Verification Code
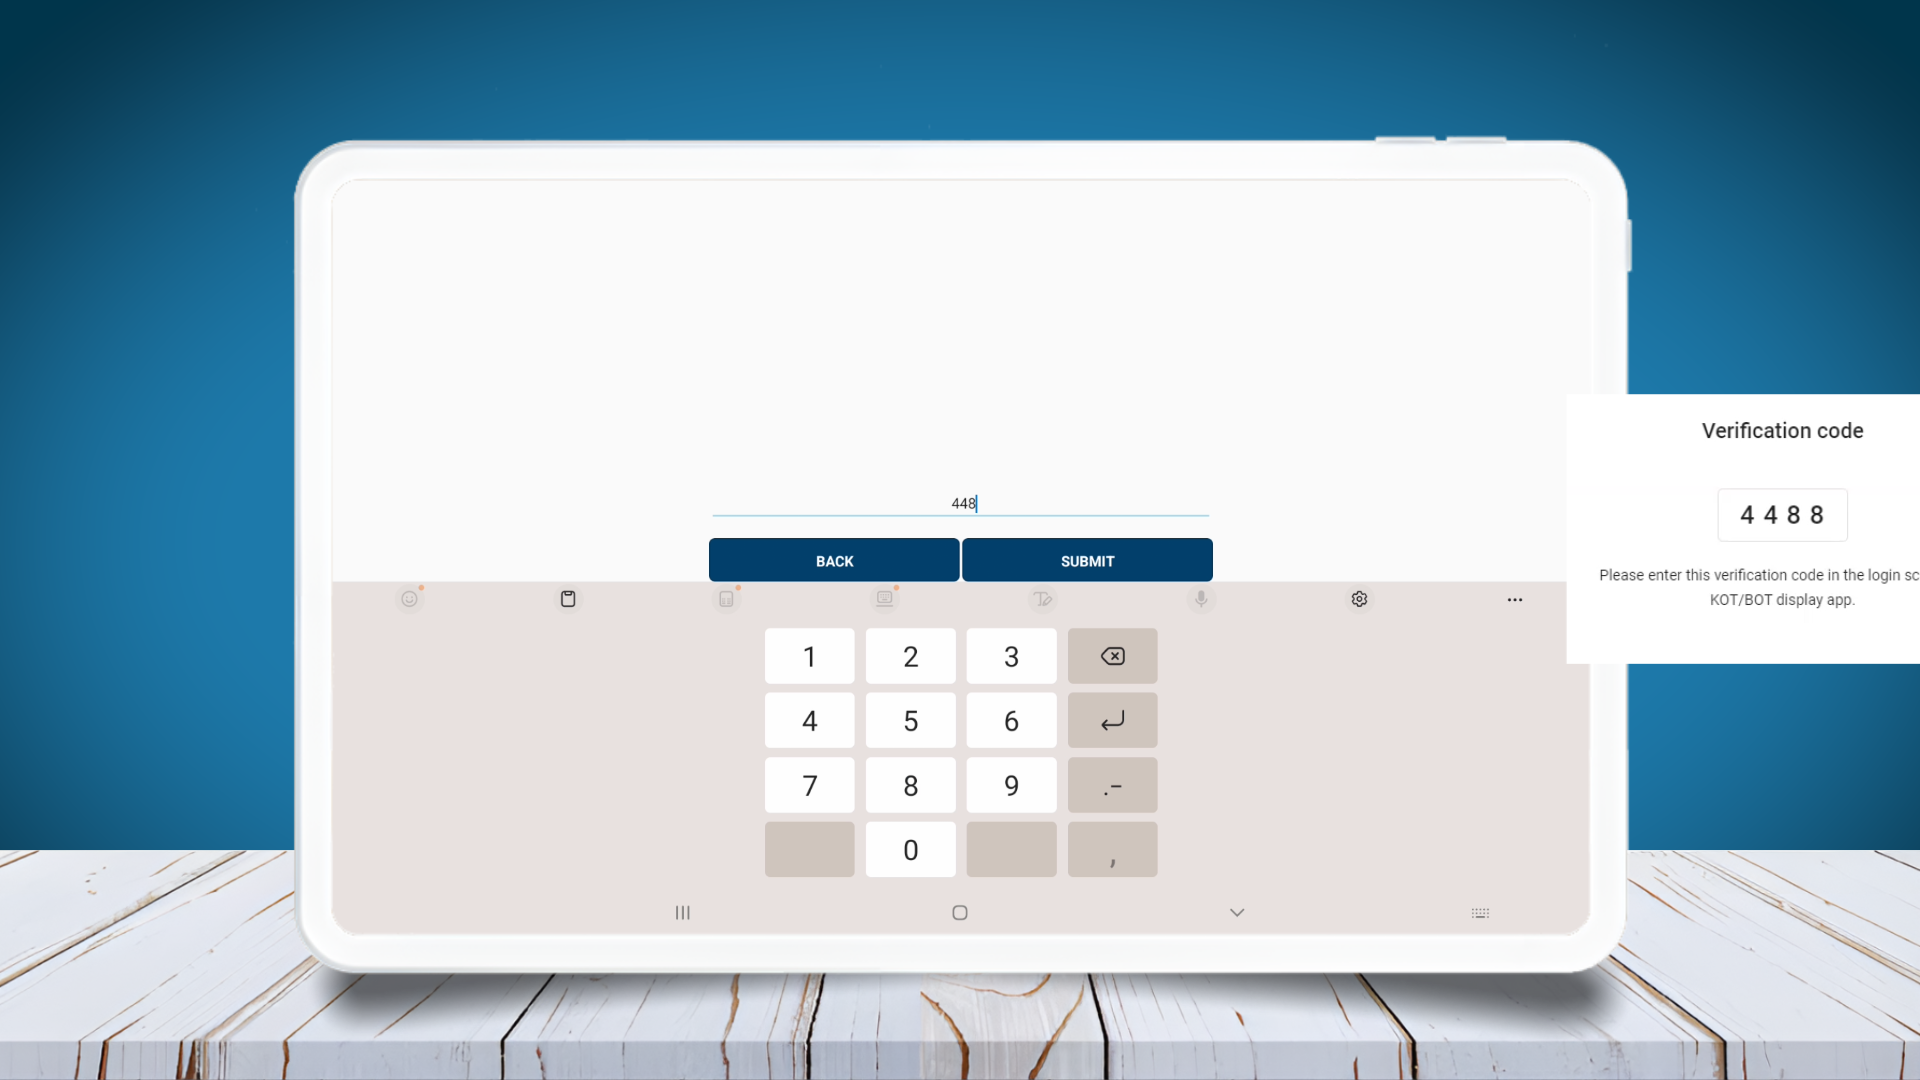
- Ensure the verification code is successfully accepted and the device is registered.
Step 9: Add KOT Groups
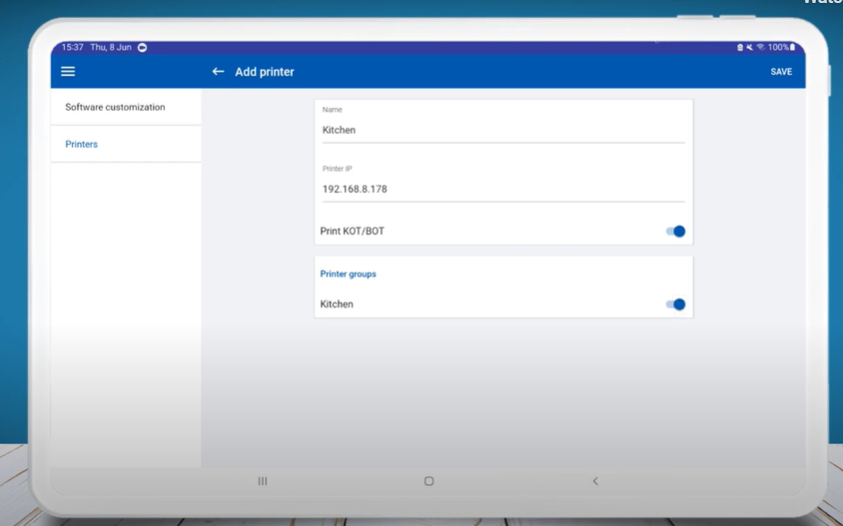
- Set up KOT groups to organize orders efficiently for kitchen and bar staff.
Step 10: KOT Overview
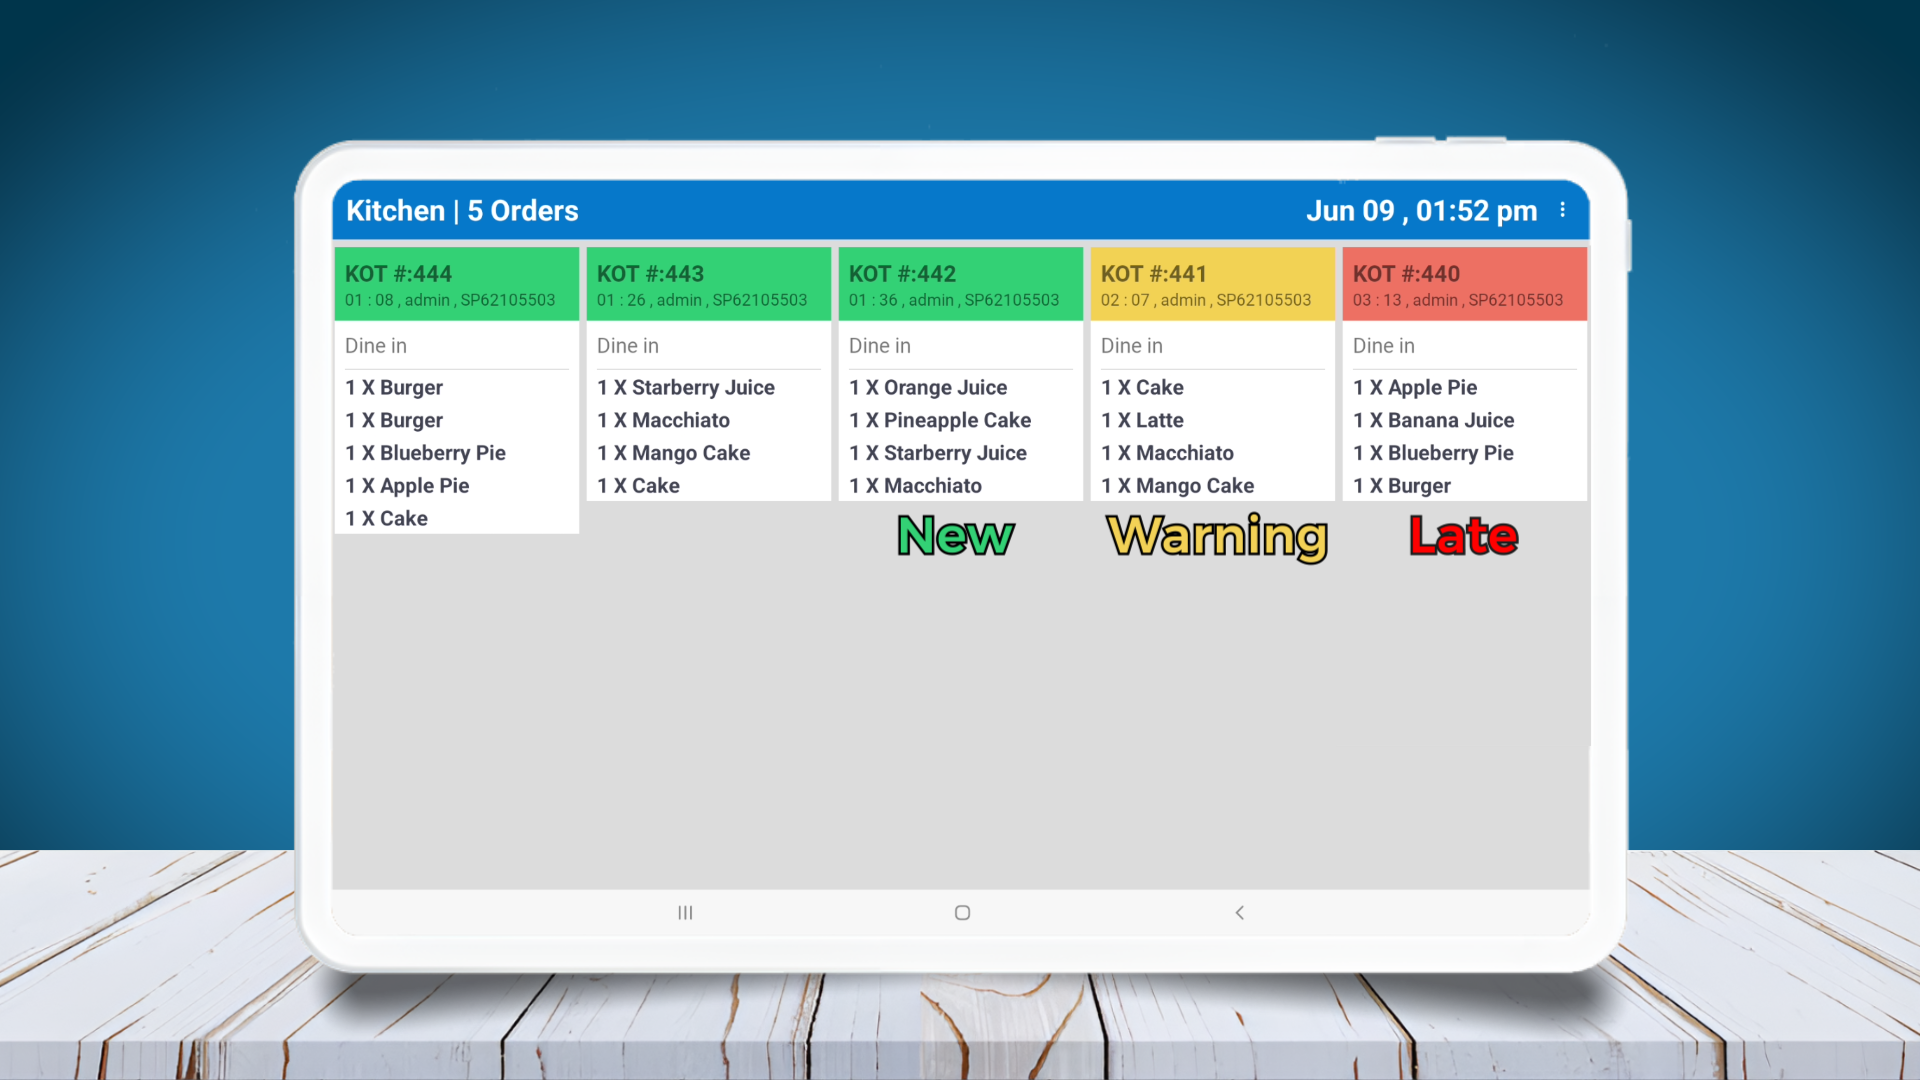
- Review the overview screen to ensure all orders display correctly and groups are set up as required.