SalesPlay POS Now Fully Integrates with QuickBooks
SalesPlay POS has introduced a full integration with QuickBooks, allowing businesses to automatically sync their sales data, invoices, and payment records directly between the two platforms, without the need for CSV exports.
With this seamless connection, all sales transactions processed through SalesPlay POS are automatically reflected in QuickBooks, ensuring accurate bookkeeping, real-time financial insights, and reduced manual work.
This new integration helps business owners save time, minimize errors, and maintain up-to-date accounting records — making it easier to manage both sales operations and financial reporting from one connected system.
Note: You can’t use both Online and Offline modes simultaneously. Please choose one integration method.
Integration Modes
- QuickBooks Online (Automatic Sync)
This mode enables SalesPlay to automatically transfer your sales data to QuickBooks at a specific time each day.
- Your POS system syncs invoices, receipts, and transactions directly with your QuickBooks account.
- You can set the sync schedule based on your business preferences.
- Offline Mode (Manual Sync)
If you prefer manual control, you can download your sales data file from SalesPlay and upload it to QuickBooks whenever needed.
- Gives you full control over when and how your data is transferred.
- Ideal for businesses with limited or unstable internet connections.
Integrate QuickBooks Online with SalesPlay POS
SalesPlay POS can connect with QuickBooks Online to automatically transfer your sales transaction data to QuickBooks. This helps reduce manual work and keeps your accounting records updated.
1. Enable QuickBooks in SalesPlay
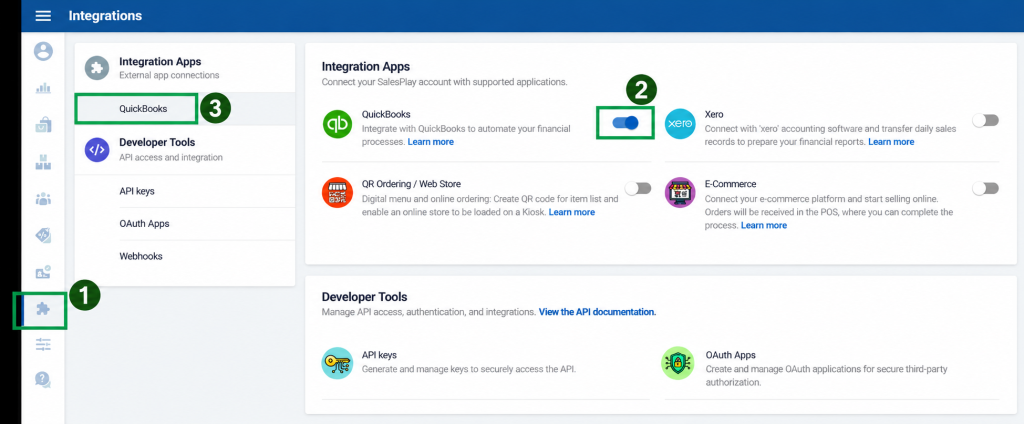
- Log in to SalesPlay Back Office.
- Go to Integrations.
- Select Apps.
- Turn QuickBooks ON.
- Go to External App Connections.
- Select QuickBooks Integration.
- Select Online.
- Click Get Started with QuickBooks.
2. Create a QuickBooks App
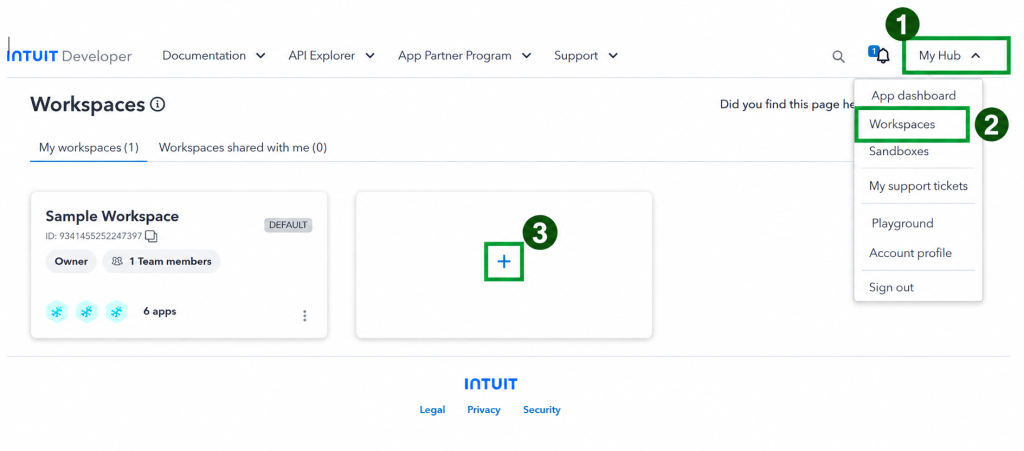
- Sign in to the Intuit Developer Portal.
- Go to My Hub → Workspaces.
- Create a new Workspace.
- Open the Workspace.
- Click + Add New App.
- Enter an app name.
- Select the required permissions and create the app.
3. Get the Client ID and Client Secret
- Open your QuickBooks app.
- Go to Keys & Credentials.
- Open the required environment.
- Click Show Credentials.
- Copy the Client ID and Client Secret.
Use Development credentials for testing. Use Production credentials for your live connection.

4. Add the Redirect URI
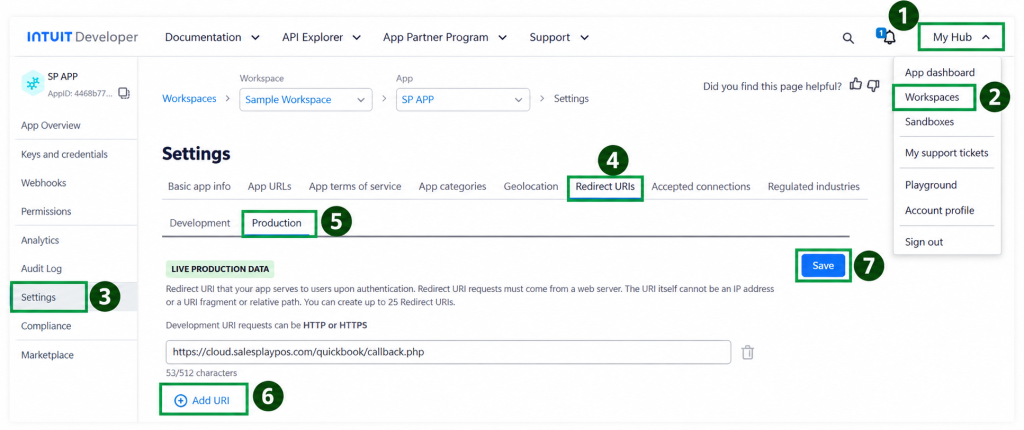
- Go back to SalesPlay Back Office → Integrations → QuickBooks Integration.
- Copy the Redirect URI provided by SalesPlay.
- Open your QuickBooks app in the Intuit Developer Portal.
- Go to Settings → Production.
- Paste the Redirect URI into the Redirect URI field.
- Click Save.
Make sure the Redirect URI matches the one provided by SalesPlay exactly.
5. Connect QuickBooks to SalesPlay
- Return to SalesPlay Back Office.
- Open QuickBooks Integration → QuickBooks Online.
- Click Connect QuickBooks.
- Enter the Client ID and Client Secret.
- Set the Start Date.
- Set the Transaction Scheduled Time.
- Turn the integration ON.
- Click Save.
6. Transaction Synchronization
Once the setup is complete, SalesPlay will transfer the applicable transaction data to QuickBooks at the scheduled time.
This means you don’t need to manually export and import sales data using CSV files.
Important
- Use Development credentials when testing.
- Use Production credentials for live transactions.
- Keep your Client Secret secure.
- Make sure the integration status is ON.
- Make sure the Redirect URI is entered correctly.
Your SalesPlay POS and QuickBooks Online integration is now ready to use.