Use the Paystack payment gateway to accept payments directly through SalesPlay POS.
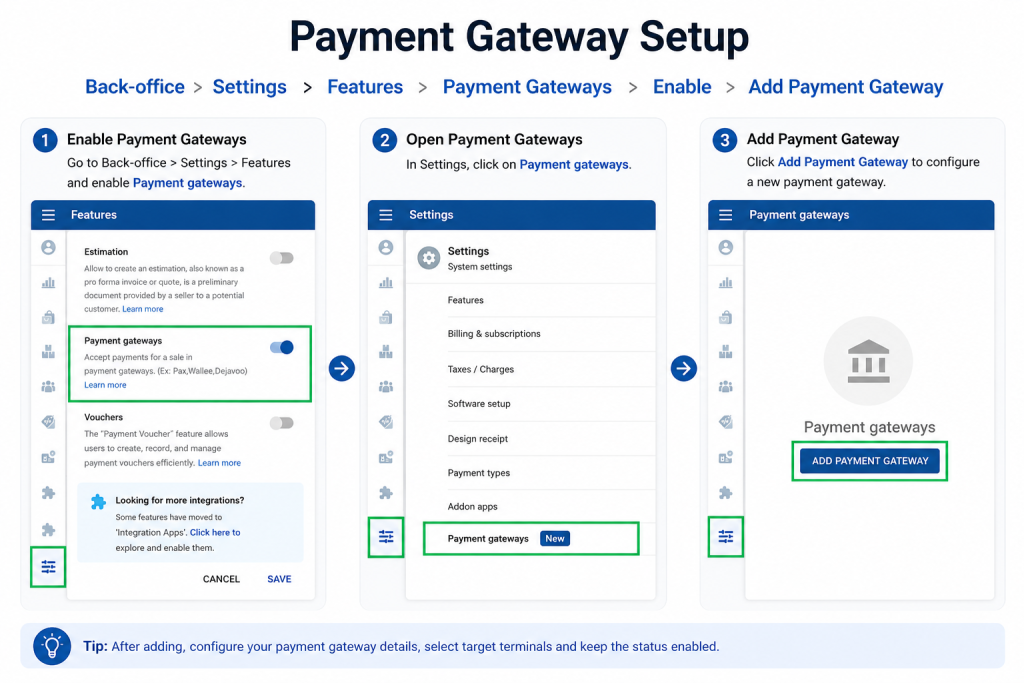
Step 1: Add Paystack in Back Office
- Sign in to SalesPlay Back Office.
- Go to Settings > Features.
- Enable Payment Gateways and click Save.
- Go to Settings > Payment Gateways.
- Click Add Payment Gateway.
- Select Paystack from the payment gateway list.
- Enter the required information:
- Device Name
- Environment Type – Production or QA
- Provider Type – Scan to Pay or Visa
- Secret Key
- Currency
- Target Terminals
- Status – Keep enabled.
- Click Save.
Step 2: Enable Paystack for Payments
- Go to Settings > Payment Types.
- Open an existing payment type or create a new one.
- Enable Payment Gateway.
- Select Paystack as the payment gateway.
- Click Update.
The payment type is now connected to Paystack.
Step 3: Check the SalesPlay POS App
- Open the SalesPlay POS App.
- Go to Settings > Payment Gateway.
- Check that Paystack appears in the list.
- If it is not available, tap Sync to sync the latest Back Office settings.
- Select Paystack and enable Status.
- Save the changes.
Paystack is now configured on the POS App.
Step 4: Process a Payment
- Open a New Sale.
- Add the items to the sale.
- Tap Charge.
- Select the required payment method.
- Select the appropriate Paystack payment option.
- Follow the instructions to complete the payment.
Once the payment is successfully completed, the sale can be finalized in SalesPlay POS.
Note: The available Paystack payment options depend on the provider type and configuration selected in the Back Office.