
The Zebra MP7000 Scanner Scale allows businesses to scan product barcodes and automatically capture item weight at checkout. When connected to SalesPlay POS, it improves billing speed, reduces errors, and streamlines cashier operations.
This guide covers configuration in the Back Office, activation in the POS App, and proper hardware connection.
Back Office Configuration

Enable weight scale functionality for your measurement unit.
Steps:
- Log in to the SalesPlay Back Office.
- Go to Products.
- Select Measurement.
- Choose an existing measurement (e.g., grams) or create a new one.
- Enable Weight Scale Status.
- Click Save to apply changes.
Notes:
- Create a new measurement using Add Measurement if your unit is not available.
- Only one measurement unit can be enabled for the weight scale at a time.
Assign Measurement to Products
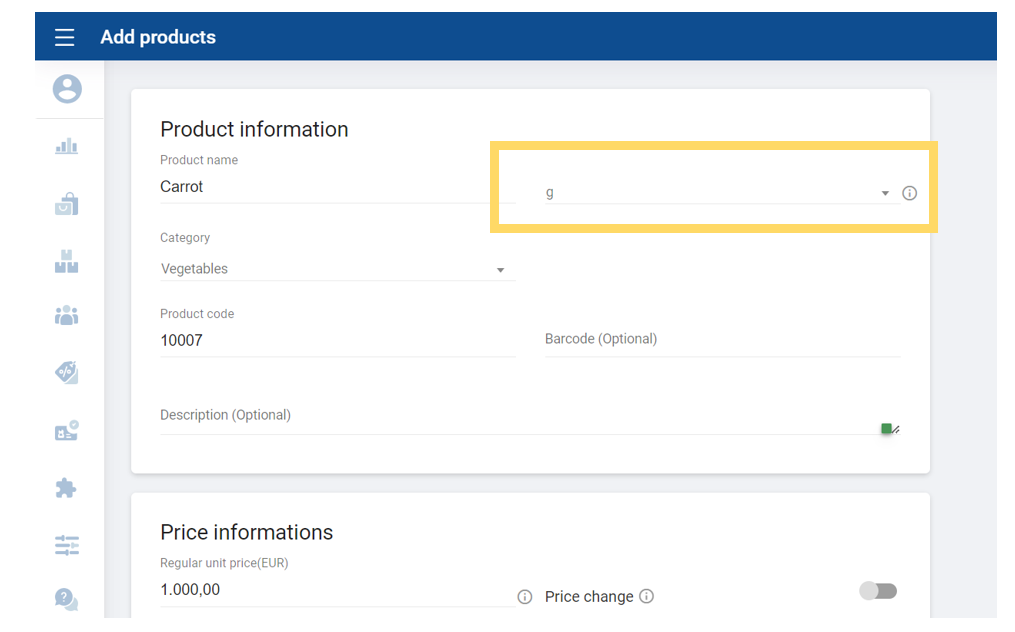
Link products to the enabled measurement to enable weight-based pricing.
Steps:
- Log in to the Back Office portal.
- Navigate to Products → Product List.
- Create a new product or edit an existing one.
- Under Sold by Each, select the measurement enabled for the weight scale.
- Add the product barcode for scanning.
- Click Save / Update.
POS App Configuration
Activate the Zebra MP7000 device inside the SalesPlay POS App.
Steps:
- Open the SalesPlay POS App.
- Tap the Menu (☰) icon.
- Go to Settings → Weight Scale.
- Tap Add New.
- Select Zebra – MP7000.
- Enable:
- Barcode Scanner
- Weight Scale
- Click Save.

Connect Zebra MP7000 to POS Device
Physically connect the Zebra MP7000 to your POS device using the CBA-U01-S07ZAR cable.
Steps:
- Power ON both the Zebra MP7000 and the Android POS device.
- Plug the RJ45 connector into the Zebra.
- Plug the USB connector into the POS device.
- When a permission prompt appears on the POS screen, tap OK.

Once connected, the scale will automatically send barcode and weight data to SalesPlay POS during checkout.